Today we take a look at Subscriber auto-responders
What are subscriber-based autoresponders for?
They are made to send messages to users on a specific action. These actions can be
- subscription
- unsubscription
Let’s say we would like to send a welcome message – maybe with a discount code – to our new subscribers
Create a new campaign

Define the subject and an optional preheader text. You can see the usage of the {firstname} tag. Use a fallback text after the pipe (‘|’) (e.g. {firstname|my Friend}) if no first name has been defined.

Create the content of your mail
Use the editor to add new modules and insert some personal messages for the user’s first mailing
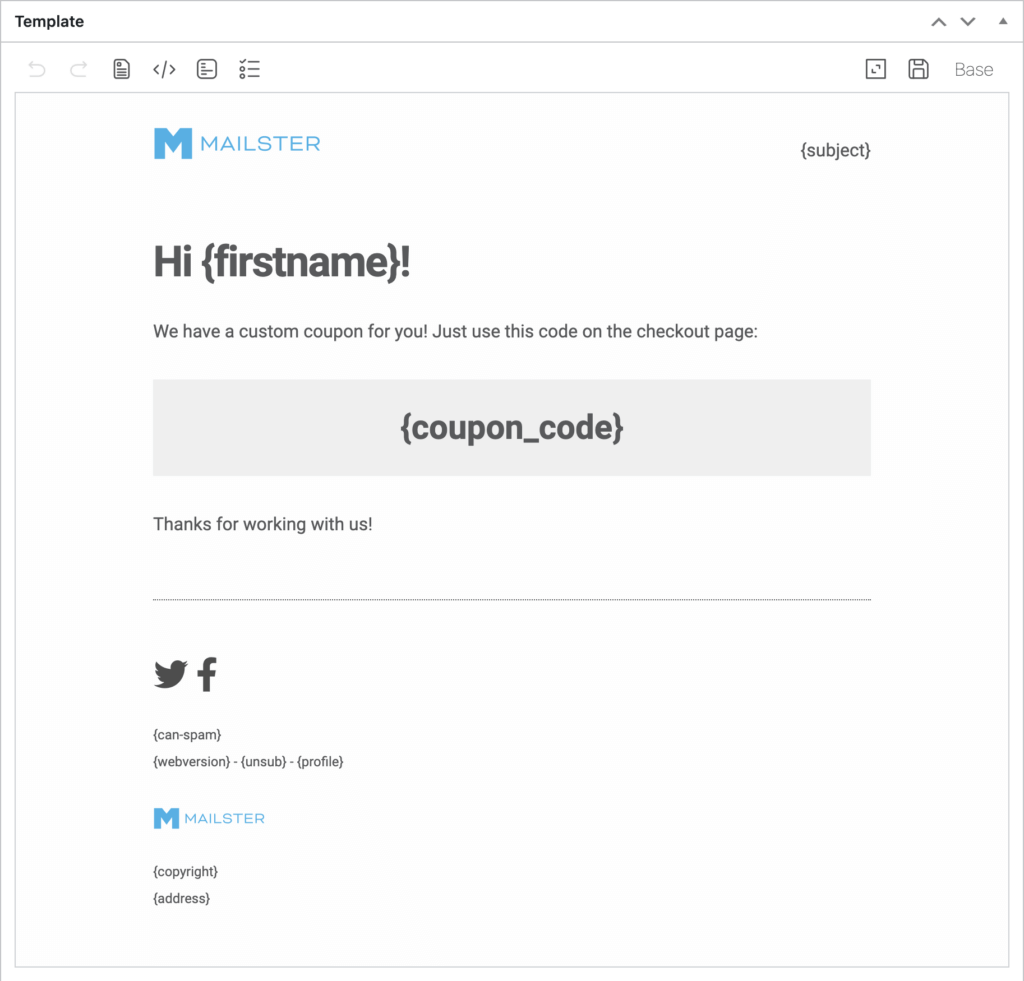
You can see the usage of the {firstname} tag again. Also, another custom tag is used: {coupon_code}. We create the content of this tag later.
Define the delivery options for the autoresponder
The next step is to tell that campaign that it’s actually an autoresponder. Click on the auto-´responder tab in the delivery meta box.
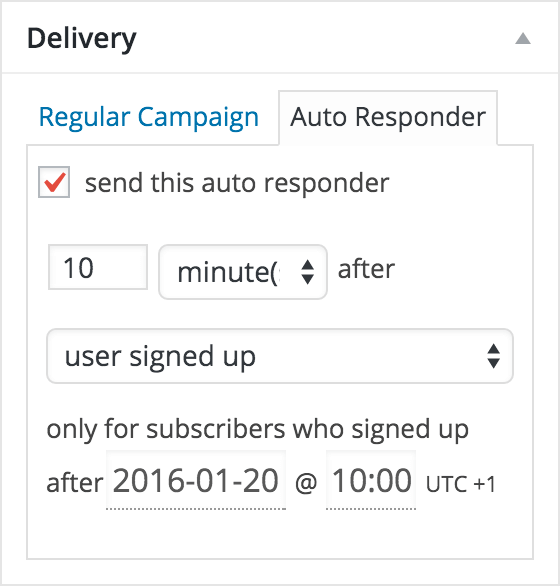
Tick the checkbox to enable the settings field and define the delay of the sending and select “user signed up”.
You can also define some conditions if you would like to limit the mailing to a certain type of user on the “Receivers” meta box.
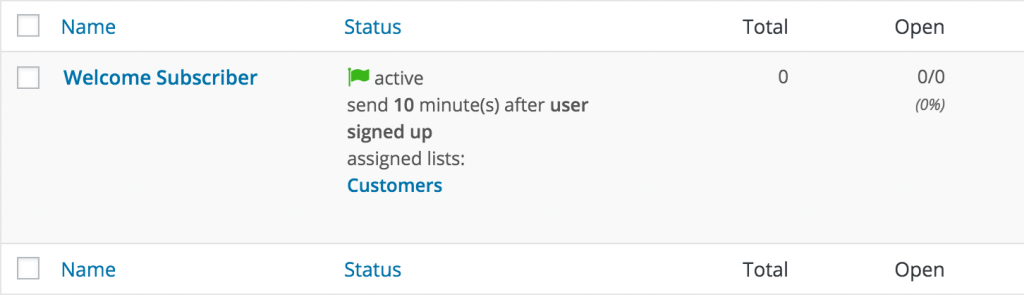
After you have saved your campaign you can find it in the autoresponder section
Creating the content of the discount code tag
To get the discount code tag display a discount code please check out the other tutorial.
Next time we take a look at action-based autoresponders.