This article is outdated. While the steps explained still work we recommend using Automation for your Series.
Creating a series of newsletter campaigns is a good way to keep your subscribers engaged with your service. But what is a series and how do you make it in Mailster?
In this tutorial, we cover the basic steps of creating a series in Mailster.
A series is like a chain of newsletter campaigns that are sent with a defined delay and certain conditions. They are also called drip campaigns, lifecycle emails, automated email campaigns, and marketing automation. You can start a tutorial series, marketing series, or any other series that should reach the inbox of your audience with a certain delay.

The very first step you need is a starting campaign. This is the first part of a series and can be any type of campaign no matter if it’s a regular campaign or another autoresponder campaign.
Create your Welcome Campaign
The very first campaign of our series is a subscriber-based autoresponder campaign. Create one as described in the other post here.
First Campaign (Campaign A)
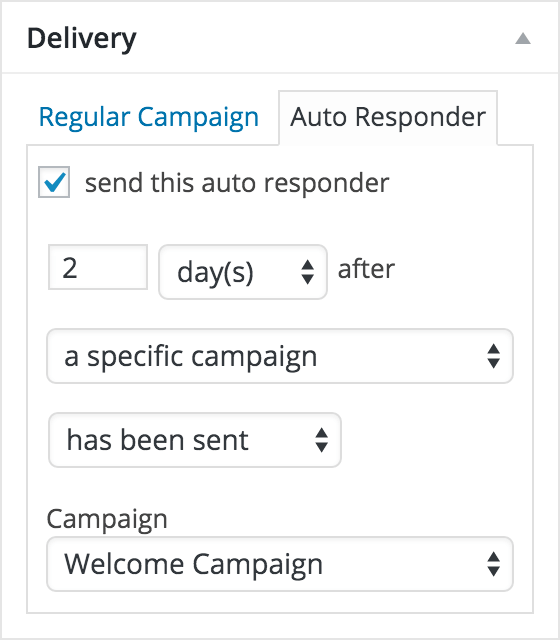
The second step is to create the first campaign after your welcome newsletter.
Select the “Auto Responder” tab in the delivery meta box and define the time the campaign should get sent after the Welcome Campaign has been delivered.
In this example, we choose 2 days after a specific campaign has been sent.
This will trigger Campaign A 48 hours after our initial campaign.
If you like to trigger the campaign only if the Welcome Campaign has been opened select the has been opened option on the drop-down menu.
Finally, select the campaign you like to target. In our case, it’s the Welcome Campaign.
Second Campaign (Campaign B)
Setup your second campaign the same as the first one but choose another timeframe. If you select 4 days after the Welcome Campaign it will be triggered 2 days after Campaign A. You can choose Campaign A instead of the Welcome Campaign too but then you have to decrease the value to 2 days. It’s simple Mathematics.
Follow these steps until you have finished your series.
All campaigns will respect the conditions you have in place but keep in mind if you send your first campaign only to subscribers of list A and the following campaigns only to list B only members of both lists will get the second campaign.
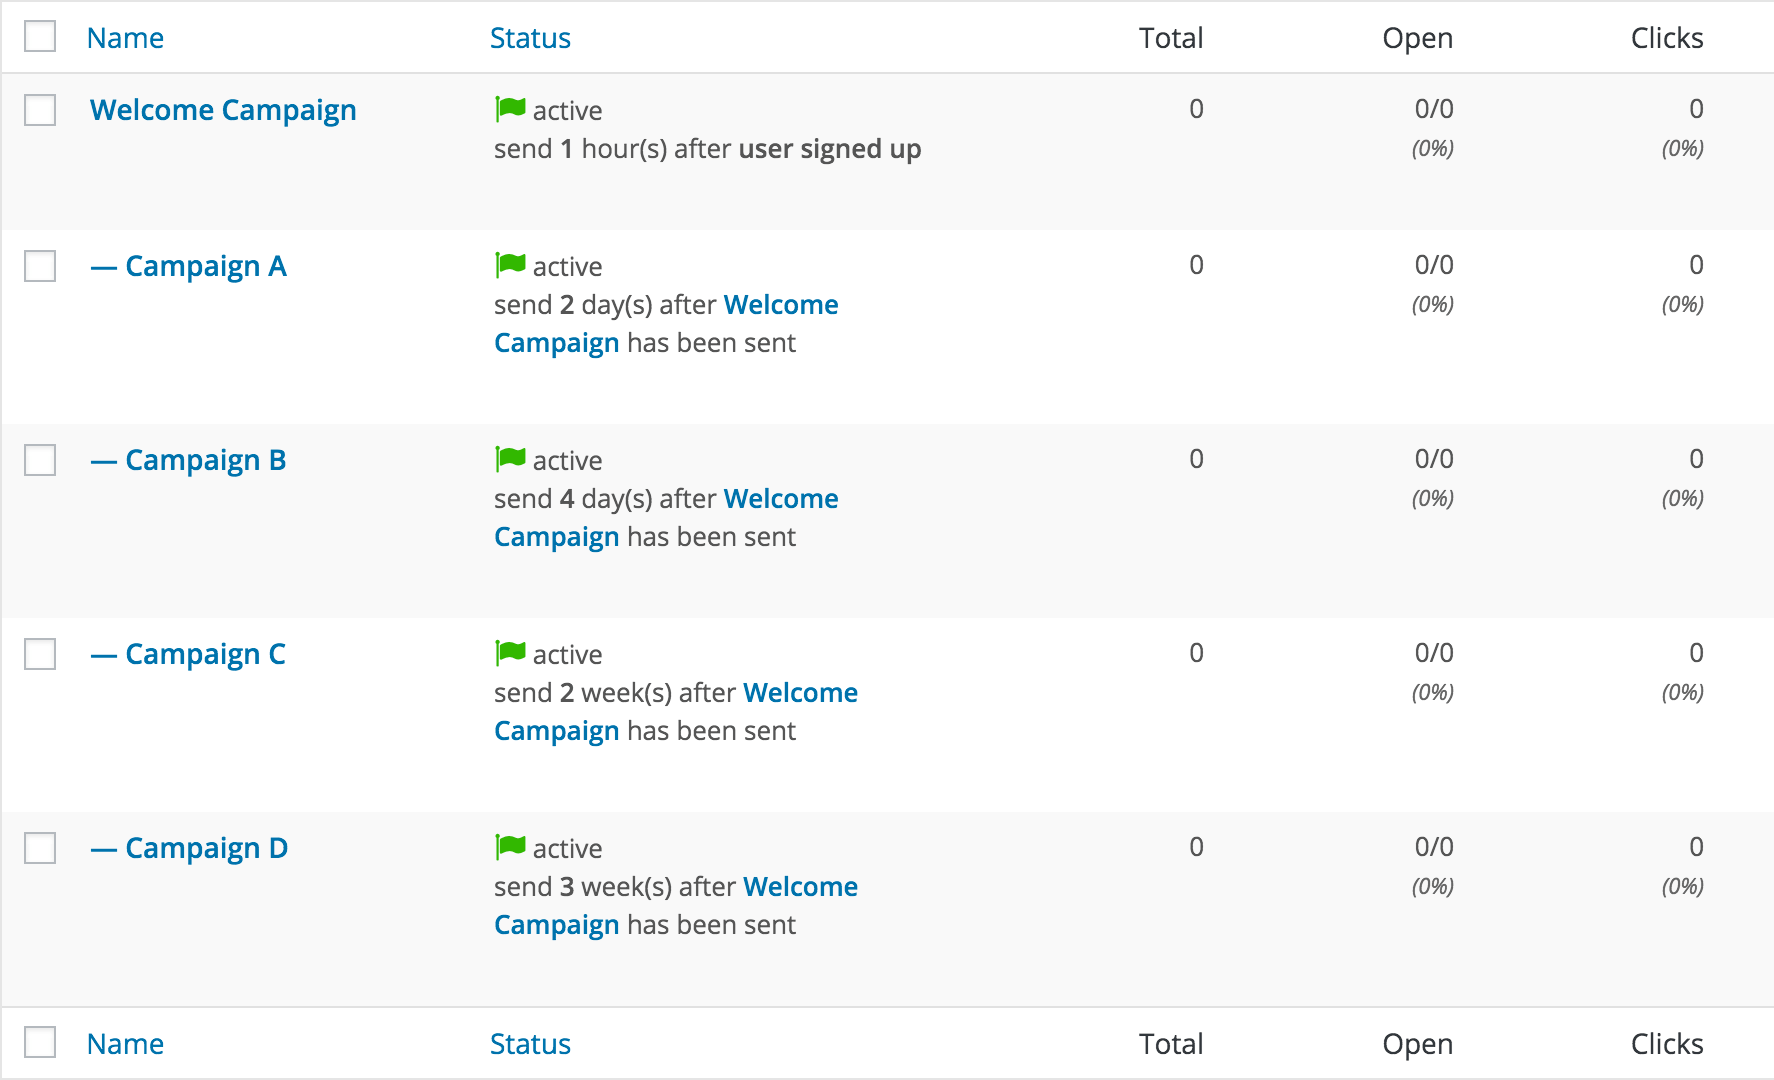
If you have finished your setup you can review your series on the autoresponder page:
If you like to pause the series you can:
Deactivate the Welcome Campaign: All subscribers who got this campaign will still get the others of this series.
Deactivate a certain campaign: No subscriber will get a deactivated campaign unless you enable it again.