Gmail by Google is a great email delivery provider, and you can use it to send all your newsletter campaigns with Mailster.
In general, we do not recommend using Gmail for marketing emails so you better look out for an alternative.
Since Gmail is not built for sending marketing emails, you have to consider a couple of things:
- Google is very restrictive with its service, and if your subscribers start marking your emails as spam, you will most likely get banned from the platform.
- With a free Gmail account, you have more limits than with a paid G Suite account (Read more about limits).
- You should only send from your Gmail address (free users) or your registered G Suite addresses.
You can always choose one of the other email service providers that Mailster can work with.
Get the free Gmail Integration plugin for Mailster
You can download the add-on from the WordPress repo or find it within the plugins section of your site. Once you’ve activated it, head over to Newsletter => Settings => Delivery and select the “Gmail” tab.
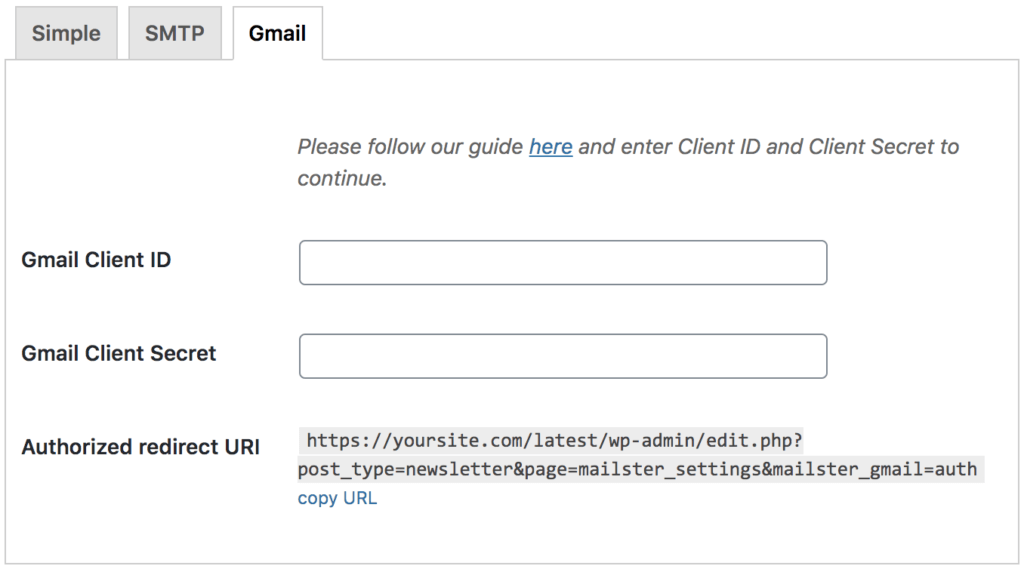
Create a Web App in your Google account.
Before we continue in Mailster, you have to create a new web app, which you can do on the Google APIs registration page.
After you have followed the link and logged in to your Google account, you have to create a project for Mailster. You can use an existing project, but we recommend creating a new one.
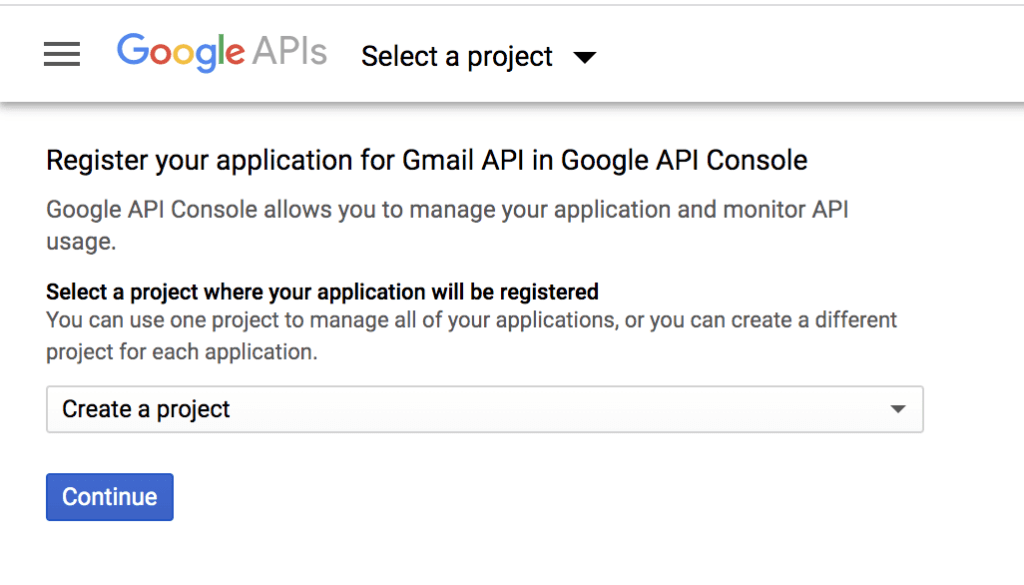
Once you finish this step, Google will tell you that the “API is enabled”. You now have to answer three questions:
- Which API are you using?
- Gmail API
- Where will you be calling the API from?
- Web server (e.g. node.js, Tomcat)
- What data will you be accessing?
- User data
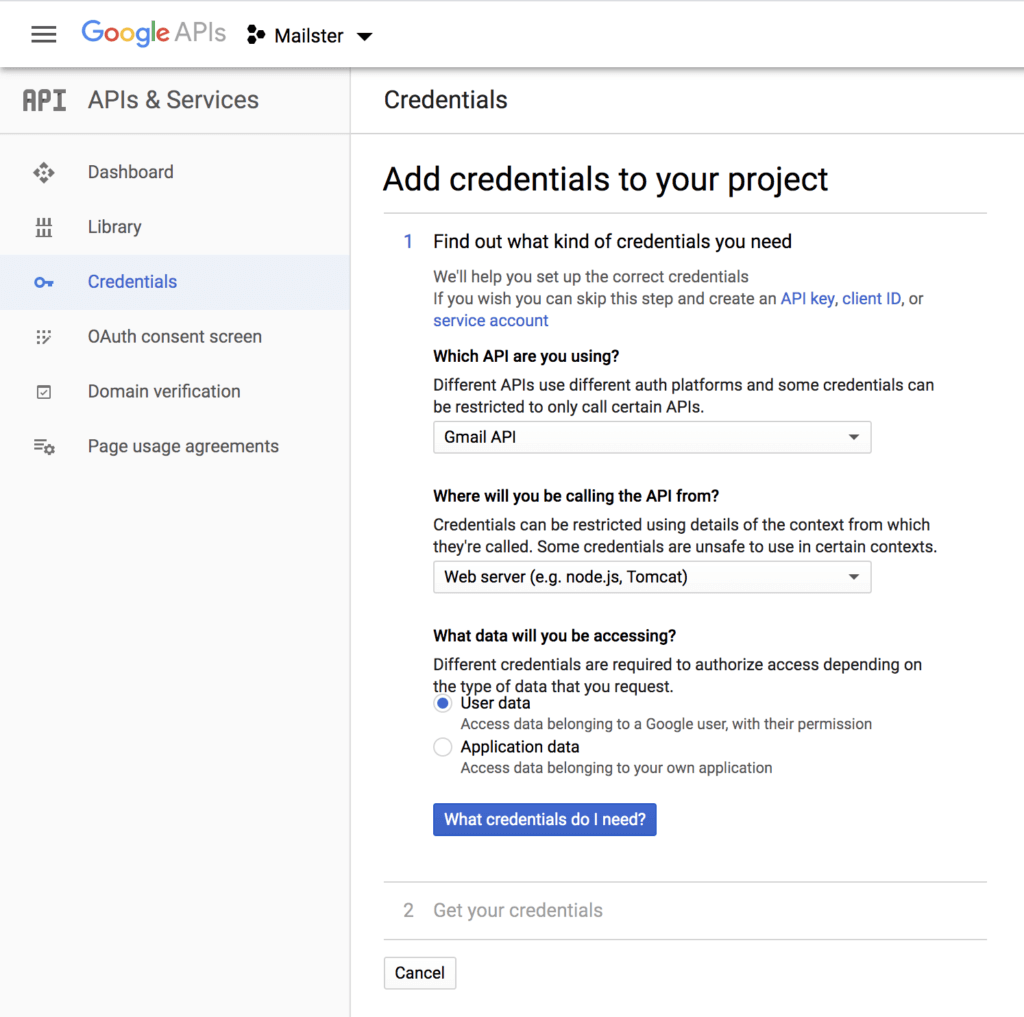
Then click on What credentials do I need? to continue, which opens a modal box with the Set Up OAuth consent screen, where you click on the Set Up Consent Screen link.
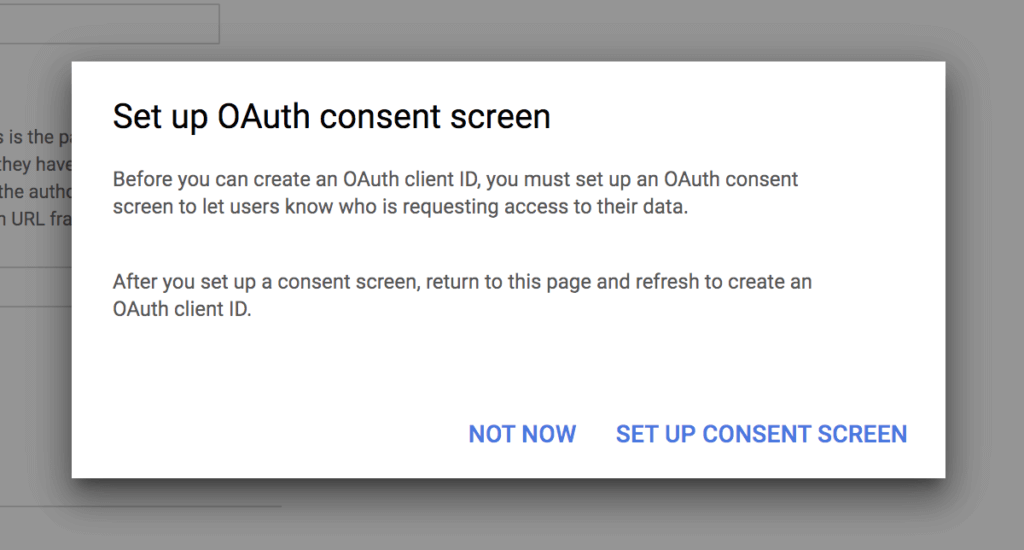
You now have to select which type of content screen you would like to use.
Internal: Only users from the same organization can request access to your app.
External: Every user with a Google Account can access your app.
For @gmail.com users (free), only the “External” option is available, so choose this one.
Google doesn’t have to verify your application if you choose External, as Mailster should be the only app to which you give access to this application. More on that later.
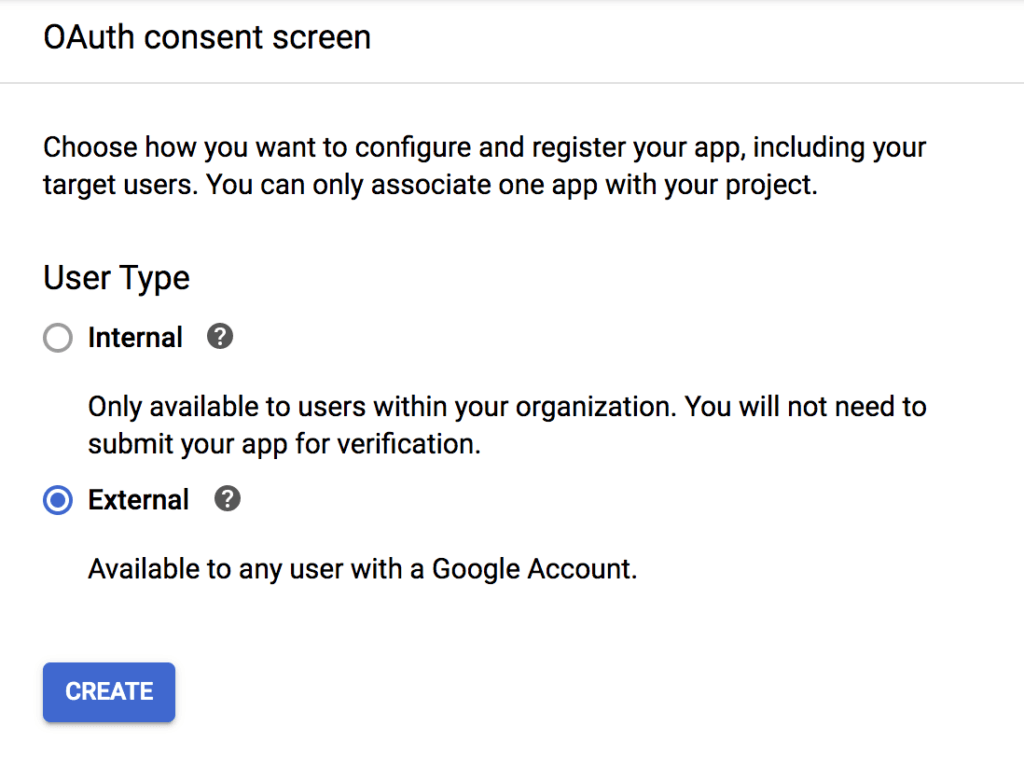
Click on Create to define the name of your Application.
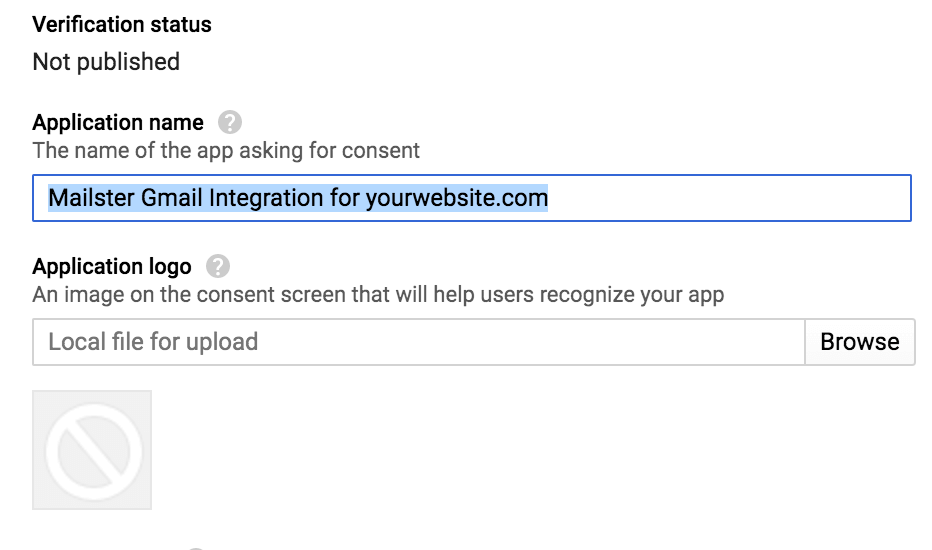
Give your app a reasonable name so you can remember it later. You can use “Mailster Gmail Integration for yourwebsite.com“, for instance. You can optionally define a logo as well.
Below your Application name, you have to enter the Authorized Domain, which is yourdomain.com (without www).
For the Application Homepage link, Application Homepage Policy link, and Application Terms of Service link, just insert your homepage URL, as the consent screen will only be seen by yourself.
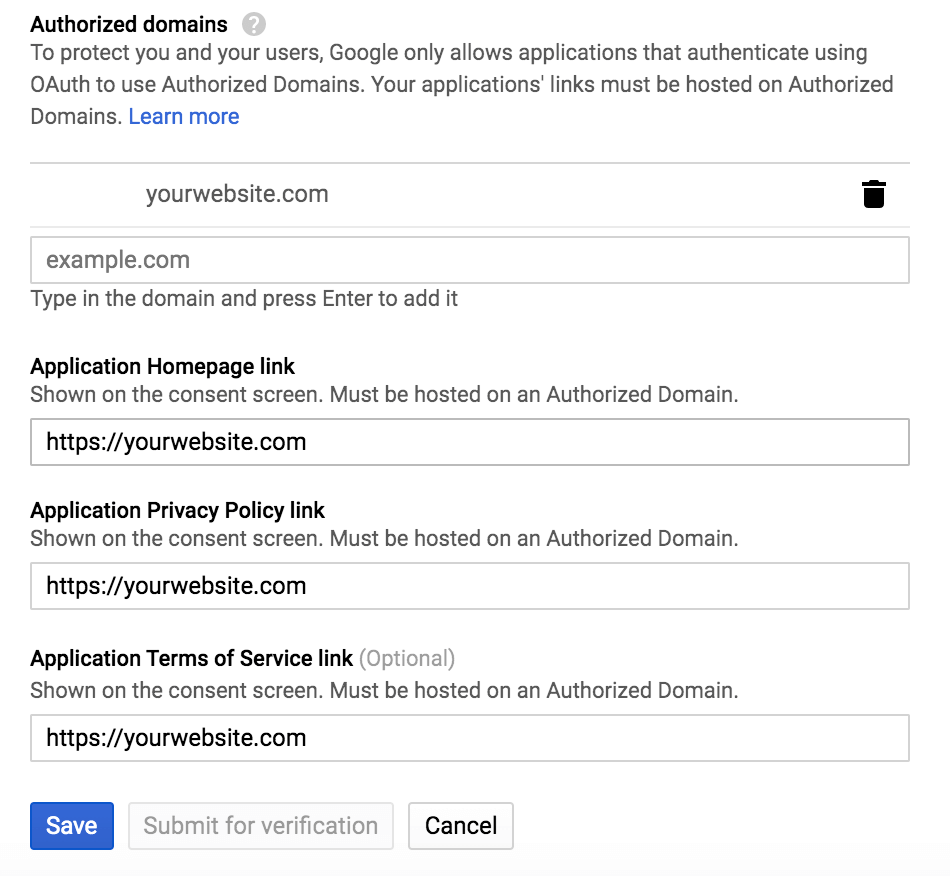
When you are finished click on the save button (You do not have to submit the app for verification).
Create an OAuth Client ID
You will come back to the dashboard where you have to create an OAuth client ID.
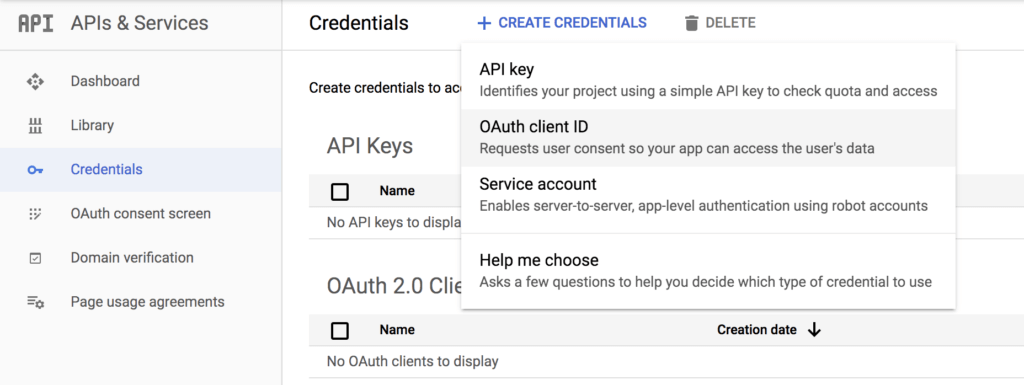
On the Add credentials to your project screen can define a custom Name or keep it as it is.
For Authorized JavaScript origins, you have to enter the URL of your site.
For the Authorized redirect, URIs, you need the address from the settings page of the Gmail add-on in Newsletter => Settings => Delivery
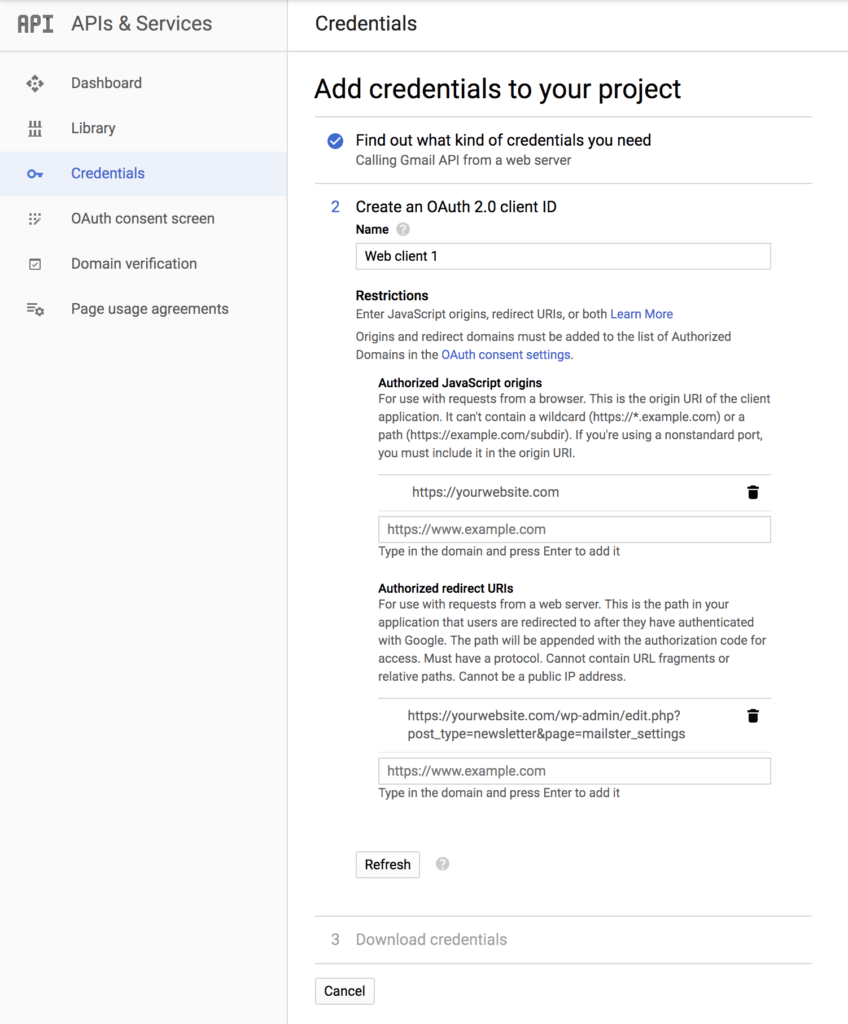
When you have entered the information, click on the “Refresh” button at the bottom. If everything is correct, you will now be able to create an OAuth client ID.
Great, you now have your own Google web application!
Get Client ID and Client Secret
You now need to get your Client ID and Client Secret.
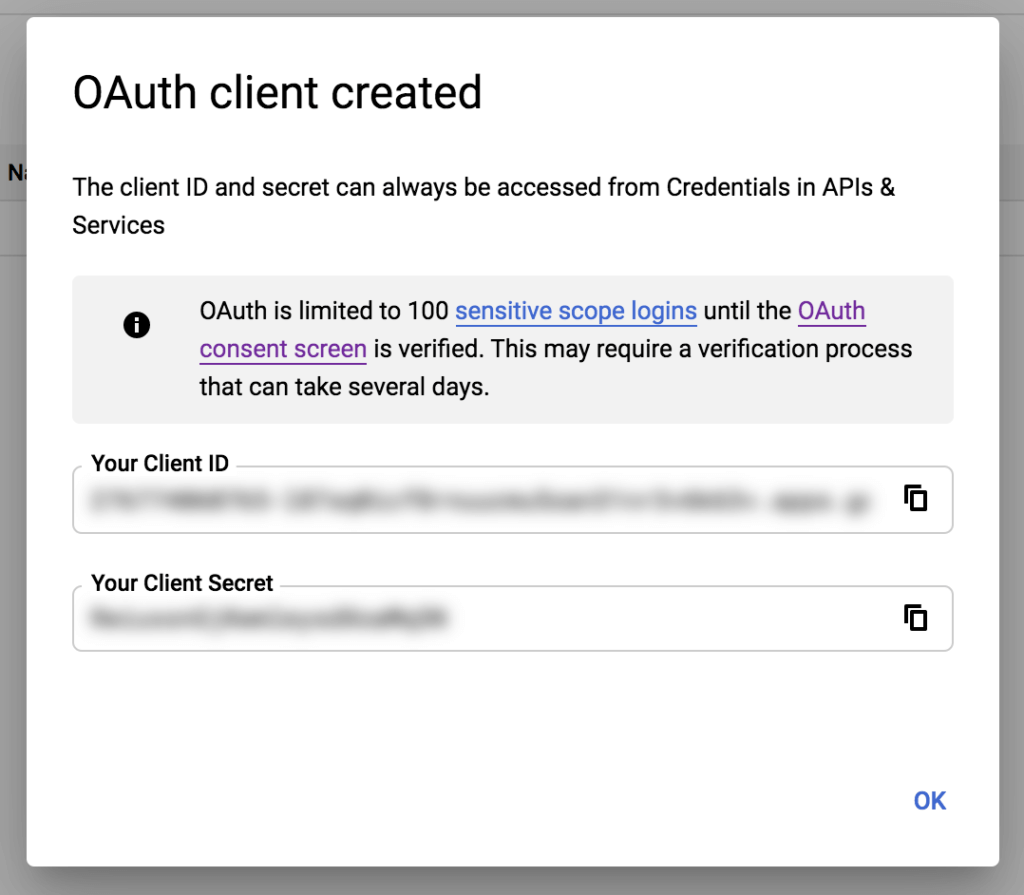
Copy and paste these details into the two fields on the delivery settings page:

Once you save the settings, Mailster will offer an “Authorize” button you have to click, which will redirect you to the Google Accounts page where you have to log in and allow access.
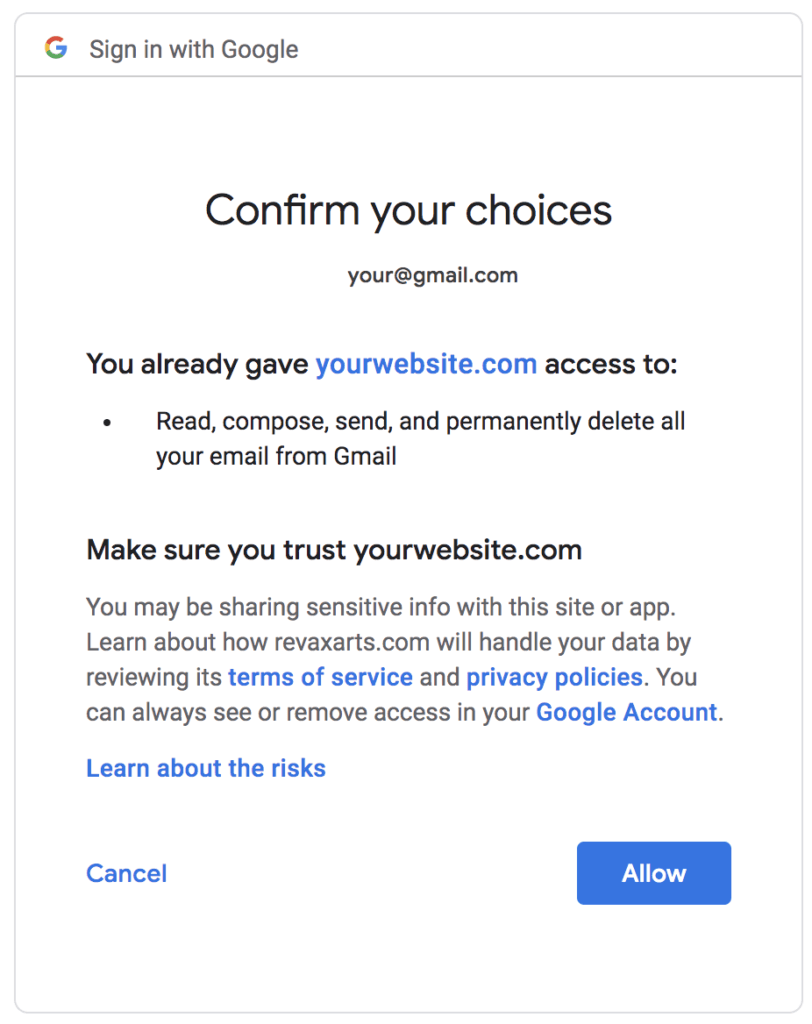
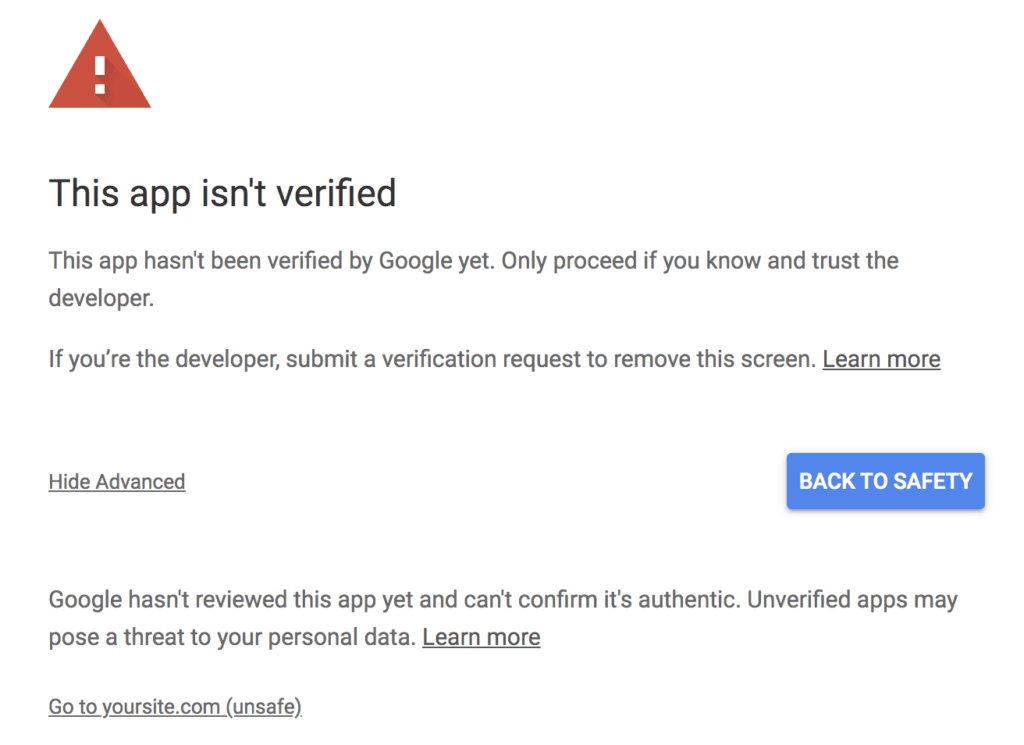
This app isn’t verified
If you use a free Gmail account and choose “External” on the OAuth consent Screen Google shows a warning before you can allow your choices. You can safely ignore this warning and click on “Go to yoursite.com (unsafe)” (Click on Advanced).
Once you are back in your Newsletter Settings, the “Authorize” button should have vanished, and you’re ready to go.
Click on the Send Test button to quickly check if this works.
Bounce Handling
The add-on can handle bounces without further actions. It will only handle bounces from emails that were sent with this addon.