It’s really recommended to send your newsletters via a dedicated email service provider. One of the big players in this field is Amazon’s Simple Email Service (SES).
Download the free extension from wordpress.org
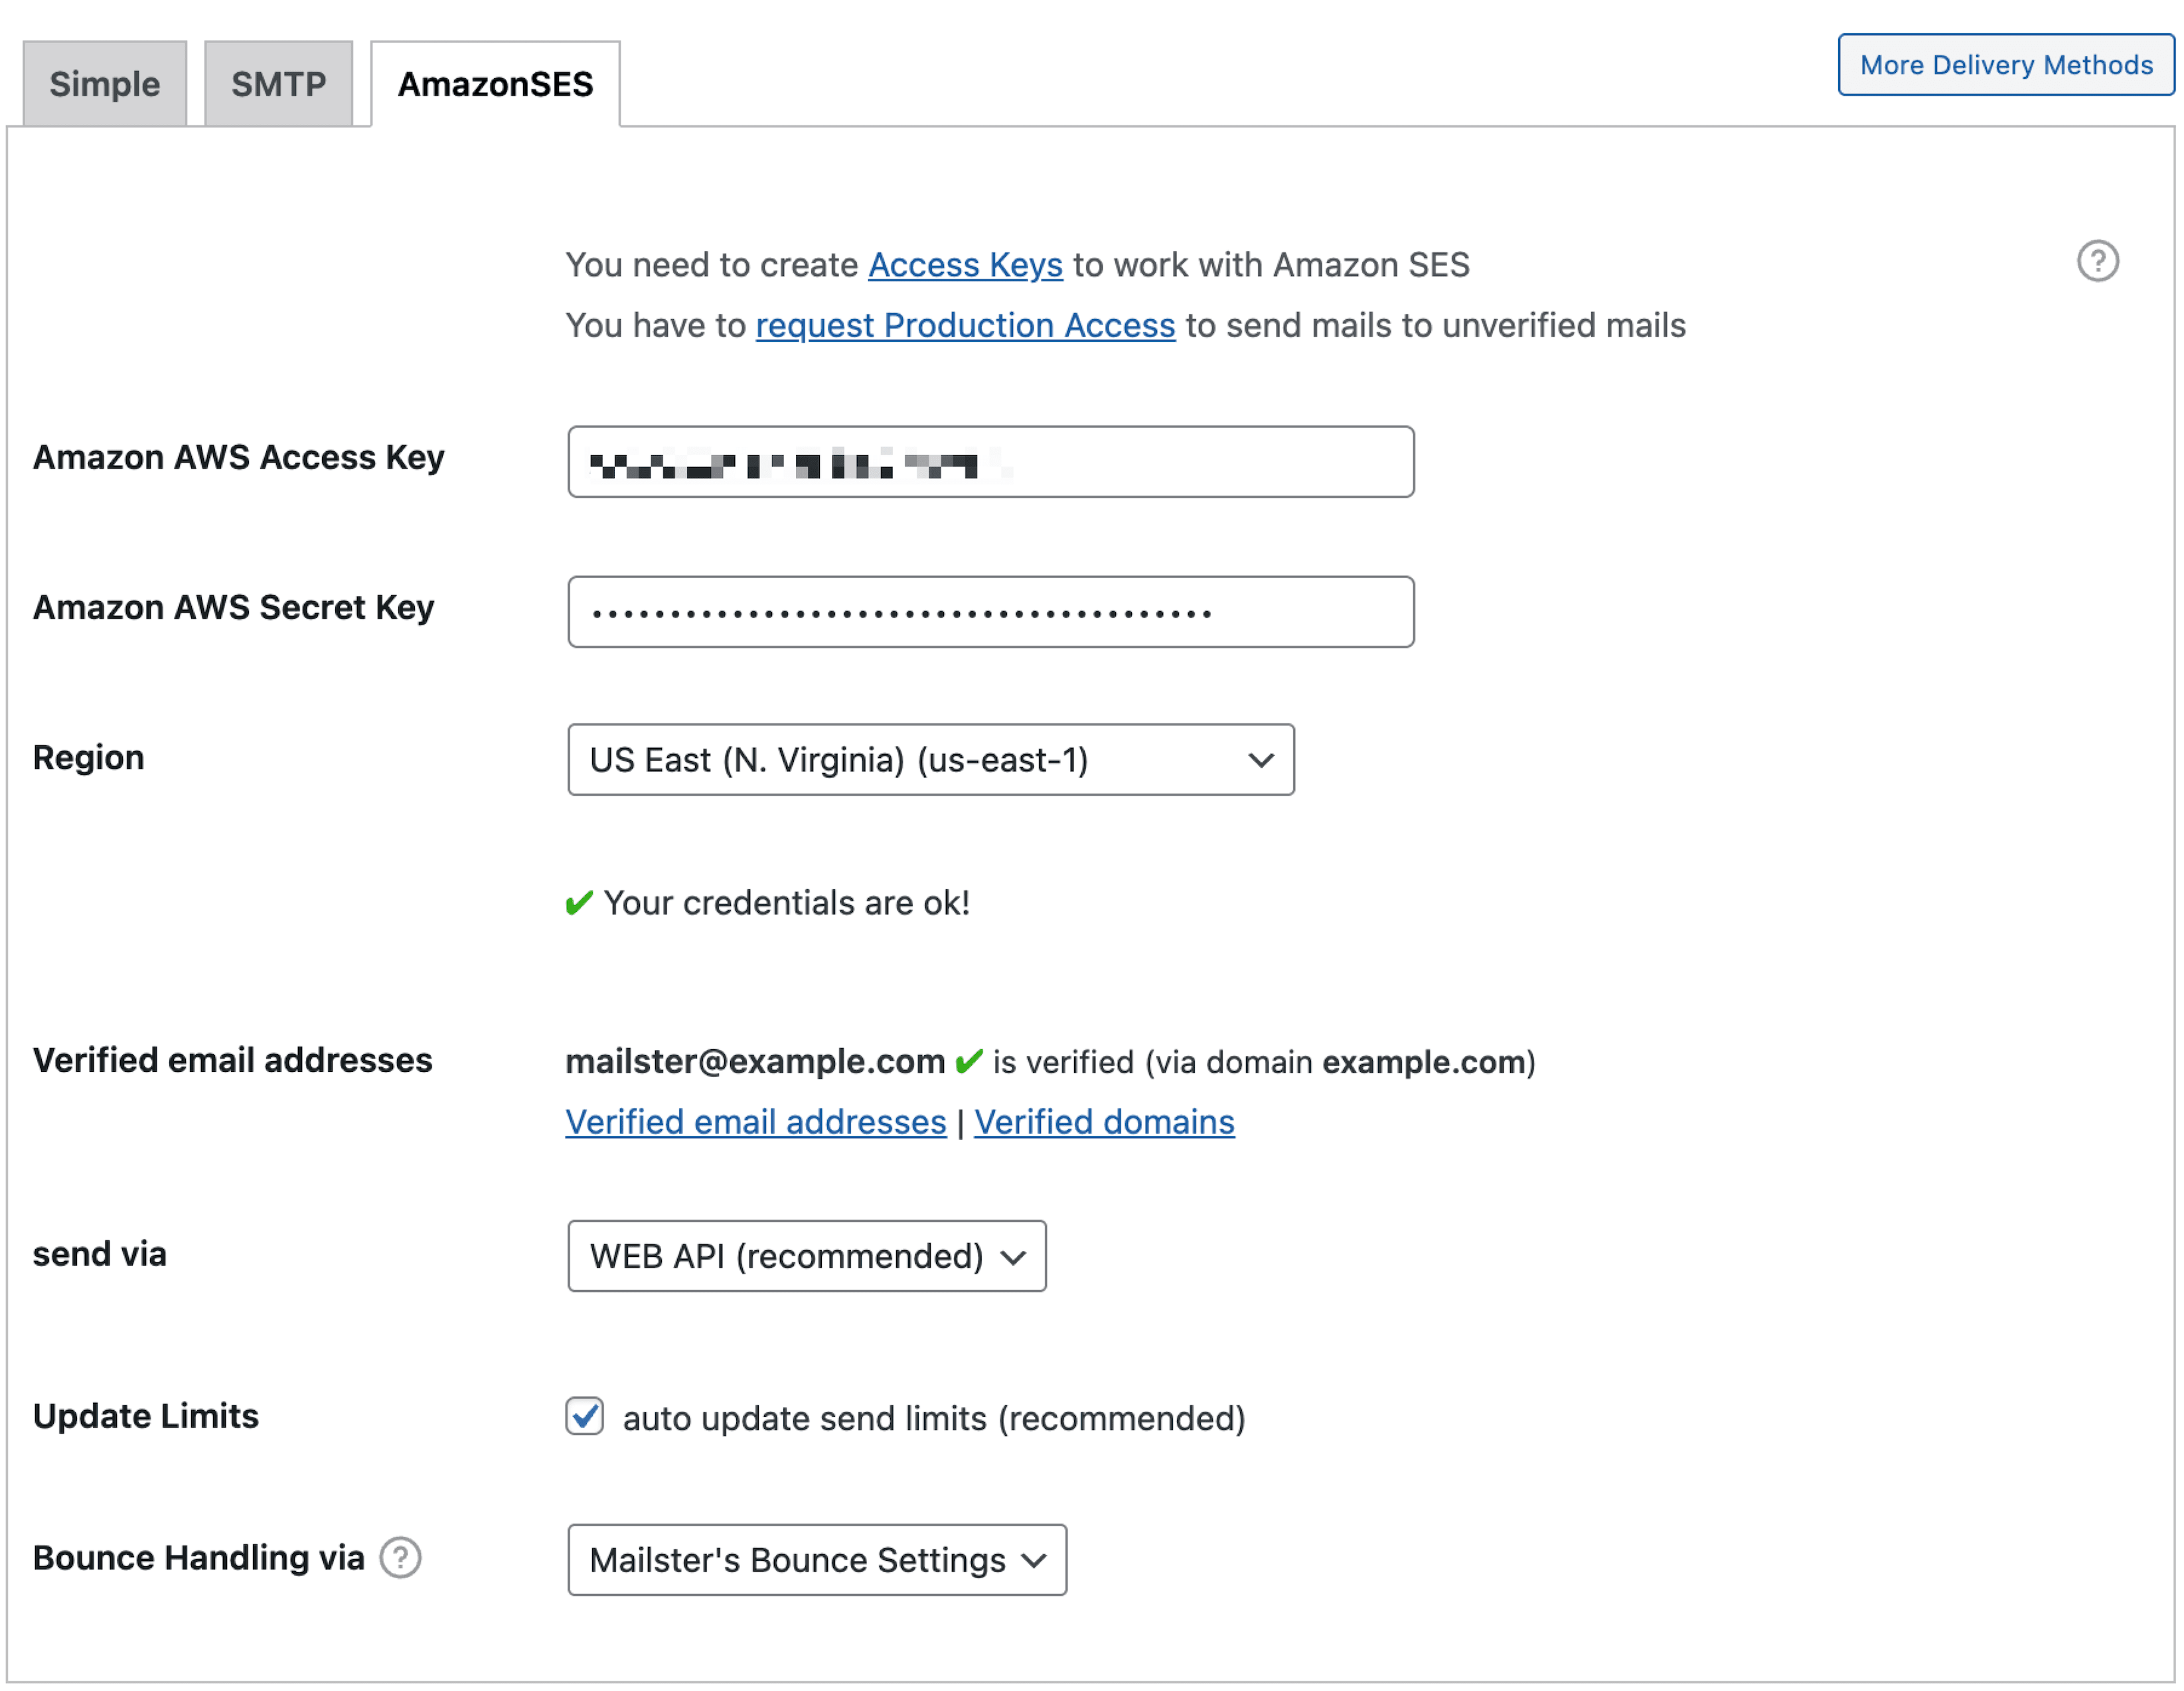
If you have successfully installed the plugin, you can find a new tab on the delivery settings page.
Set up your Amazon SES account
While the optics of the Amazon AWS account often change over time, the general process is the same. Sometimes, some options, however, are moved to a different place.
Before you can use Mailster with Amazon SES, you have to create a new account on the Amazon Web Services site. After the registration process, you have access to the AWS Console.
Find Amazon Simple Email Service
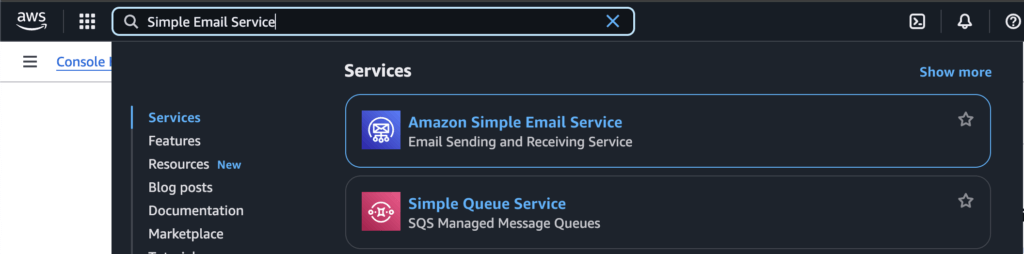
Amazon Web Services offers a lot of different services. We need to configure the “Simple Email Service” or Amazon SES.
SES Home
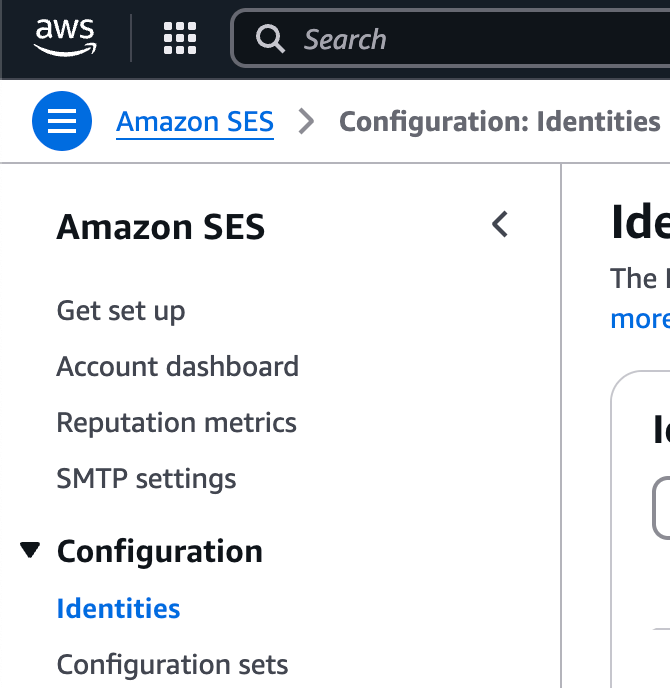
The next step is to move to the SES dashboard to manage all your email-related settings.
Here you can verify your email addresses and the whole domain. If you can change the name records of your server, it’s recommended to verify your domain so you can send it with all associated email addresses.
Sandbox mode
By default, your SES account is in “Sandbox mode”. This means it is limited for testing purposes and you cannot send to unverified email addresses.

Once you have created an identity, you can request production access here.
Create a new Identity
First, you have to create a new Identity for your domain, which can be done at “Identities”. An Identity is either a domain or, a subdomain of an email address which have to be verified to use it.
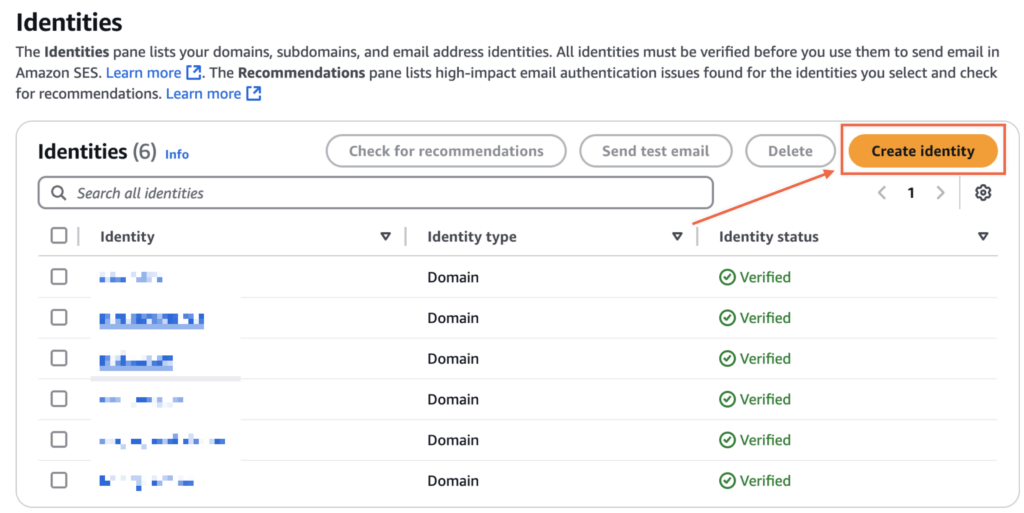
You can verify a single email address, but it’s recommended to go with a whole domain or subdomain so you can use an email address assigned to that domain.
On the “Identity details” screen, first, choose “Domain” and enter your domain in the input field.
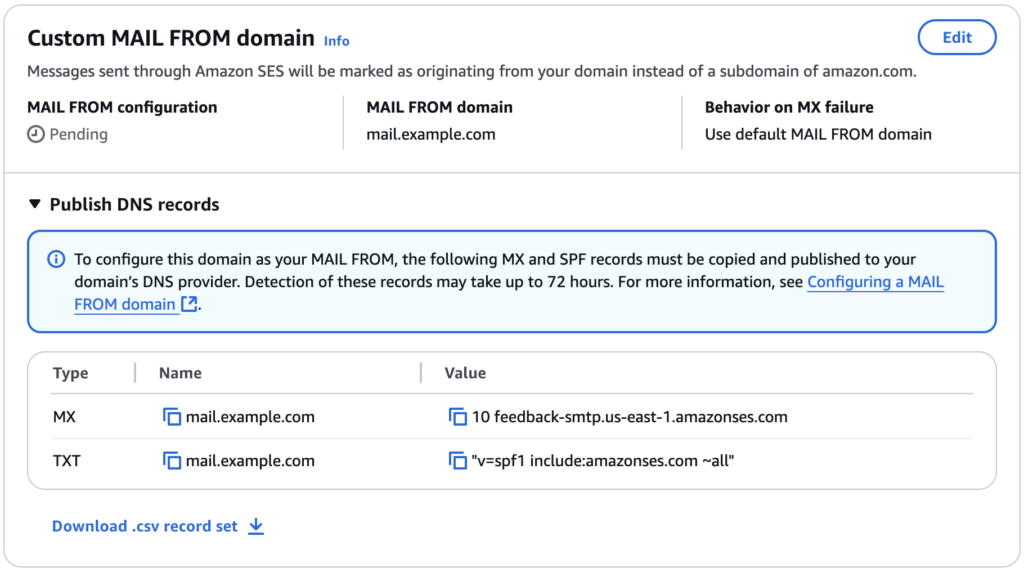
Check “Use a custom MAIL FROM domain” if you would like to use DMARC (recommended). You need to specify a subdomain for your MAIL FROM domain, like mail.example.com.
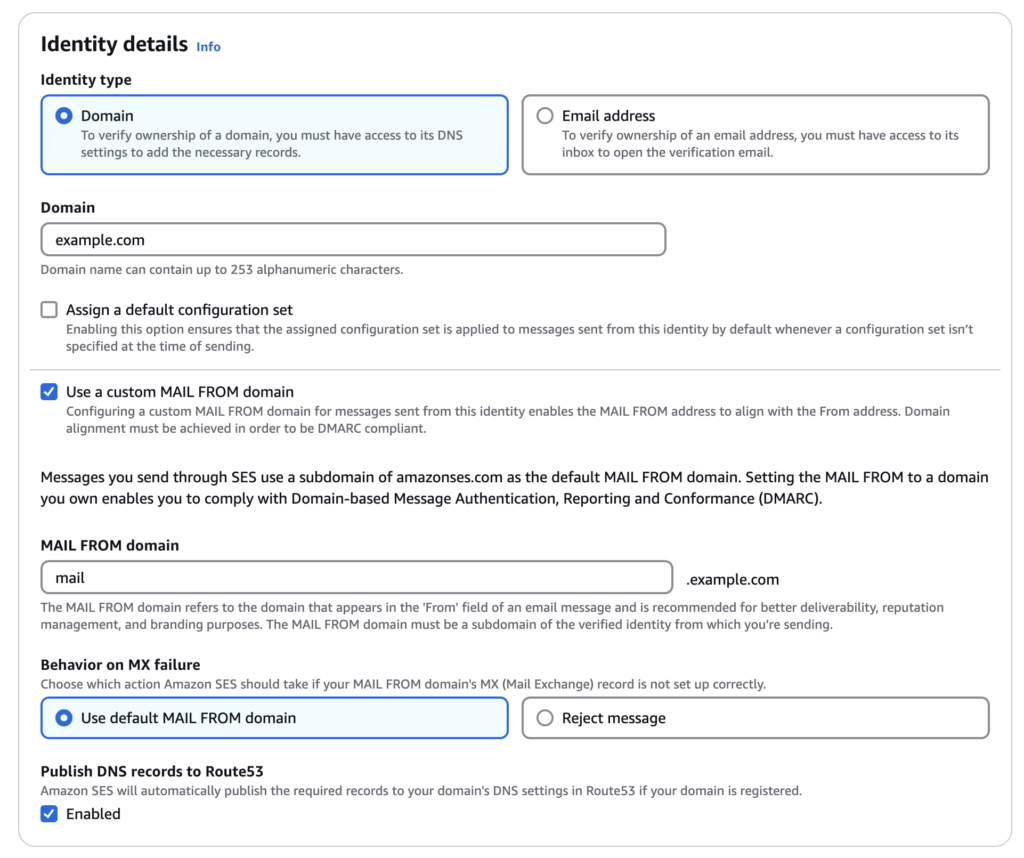
You can keep the other settings as they are.
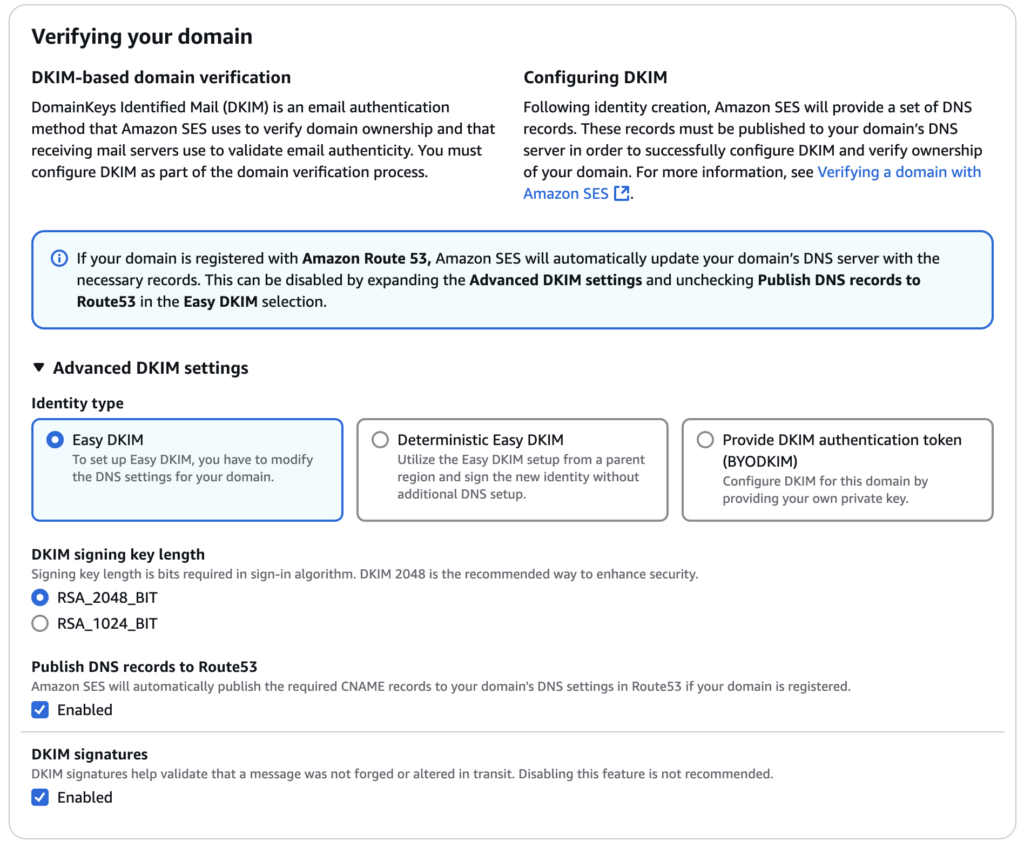
DKIM settings
Enabling DKIM on your domain is required to sign outgoing emails and help prevent your emails from ending up in the spam folder. It is highly recommended to do this.
You can go with “Easy DKIM” or any other of the provided options.
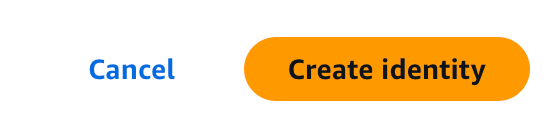
Finally, click on the “Create Identity” button at the bottom to create your identity.
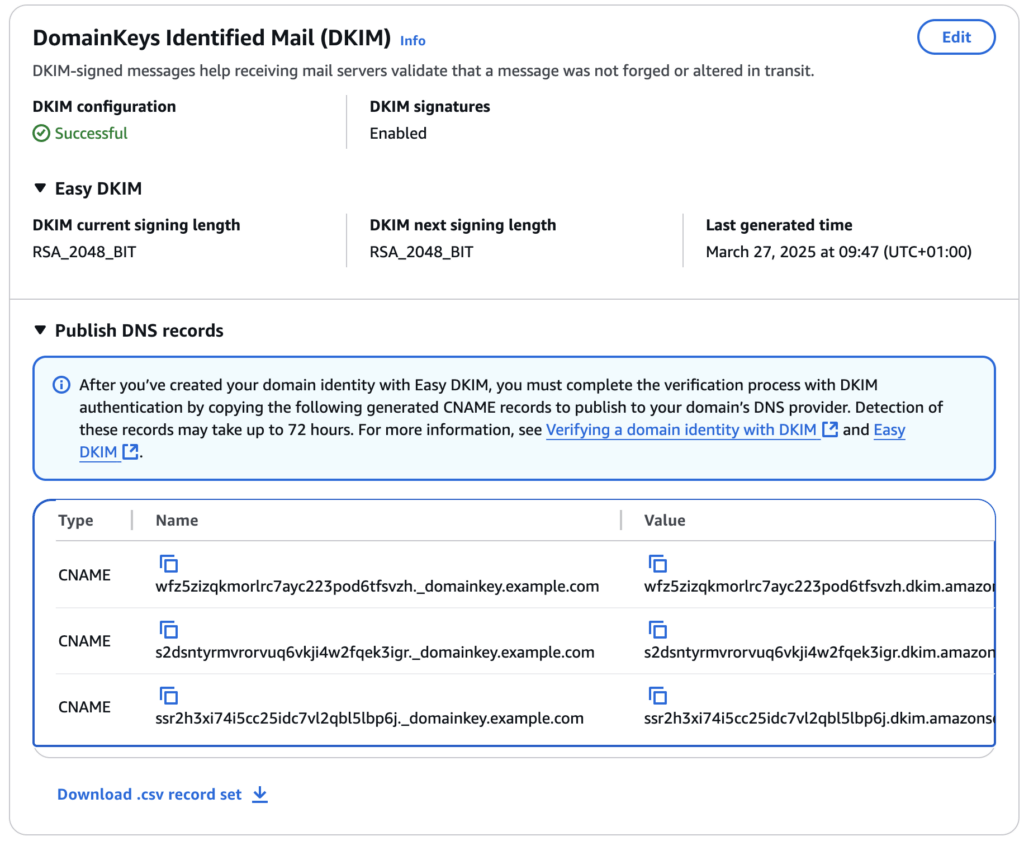
Update your DNS settings
You now have to add some entries to the DNS of your domain. Depending on your register, this can look different.

First, add CNAME records from the DomainKeys Identified Mail (DKIM) section.
If you have chosen to use your MAIL FROM domain, you have to add additional entries to your domain’s DNS:
Once the DNS is updated your domain should be labeled as “Verified” and you are ready to go.
Please note that updating your namespace may take up to 48 hours to take effect around the globe!
Get your Amazon SES Access keys
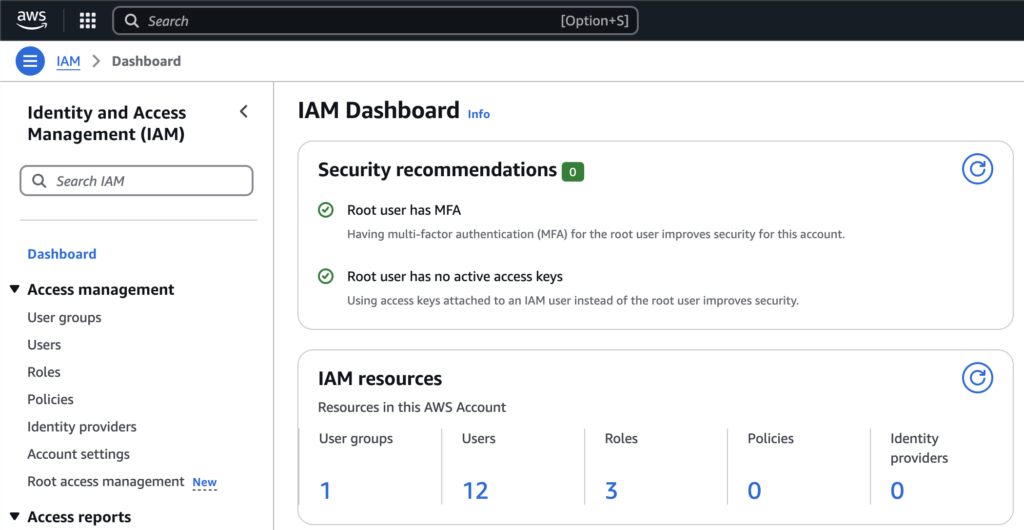
Next, you have to create a new User to access the created identity. While you can use the root user, you should create a new one for each domain.
Go back to the search field at the very top search for “IAM” (for Identity and Access Management) and head over to the IAM Dashboard.
Create a new User
A user can have certain capabilities to access parts of your Amazon AWS account. We need a user who can only use the features of SES.
Click on “Users” at “Access management” and click on “Create user”.
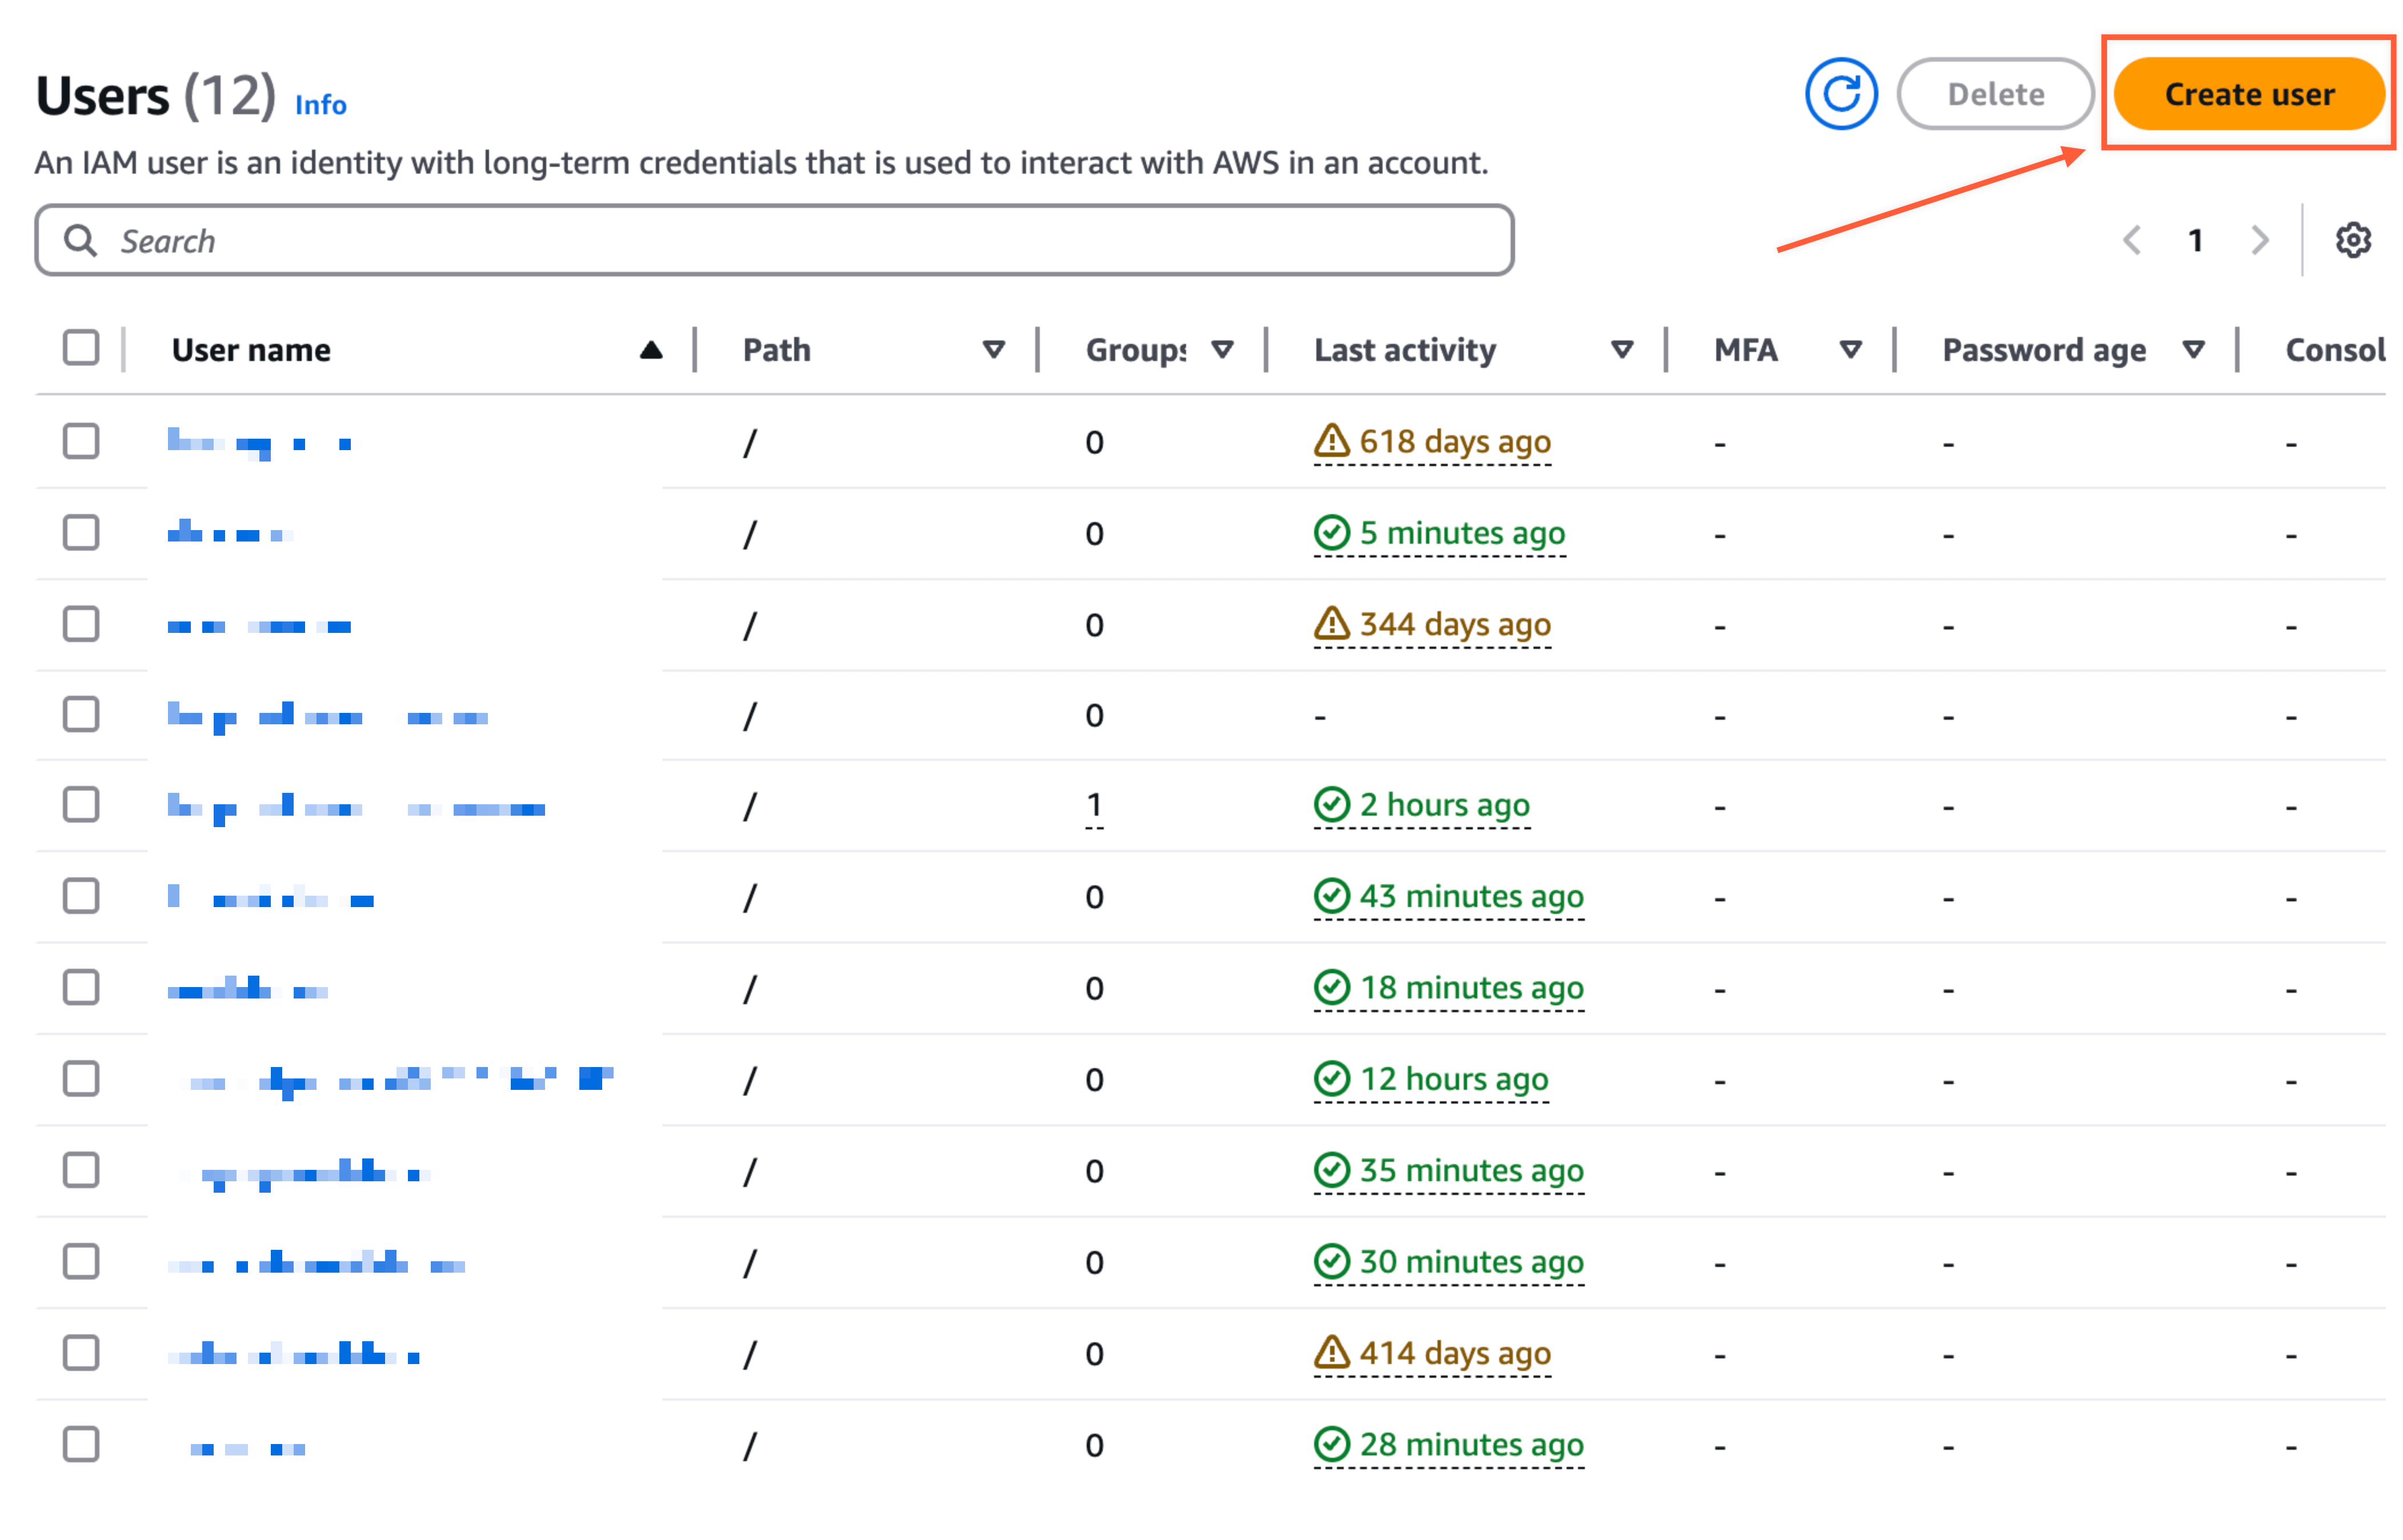
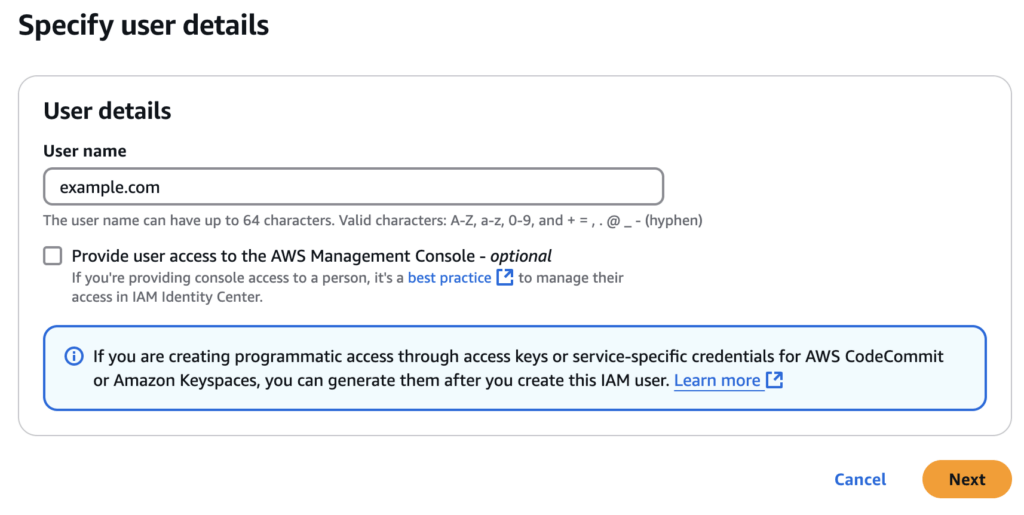
Choose any name as “User name”. We recommend using the current domain to identify the user later.
Set Permissions
In general, you should set as less permissions for that user as possible. Mailster requires at least these permissions:
AmazonSESFullAccess
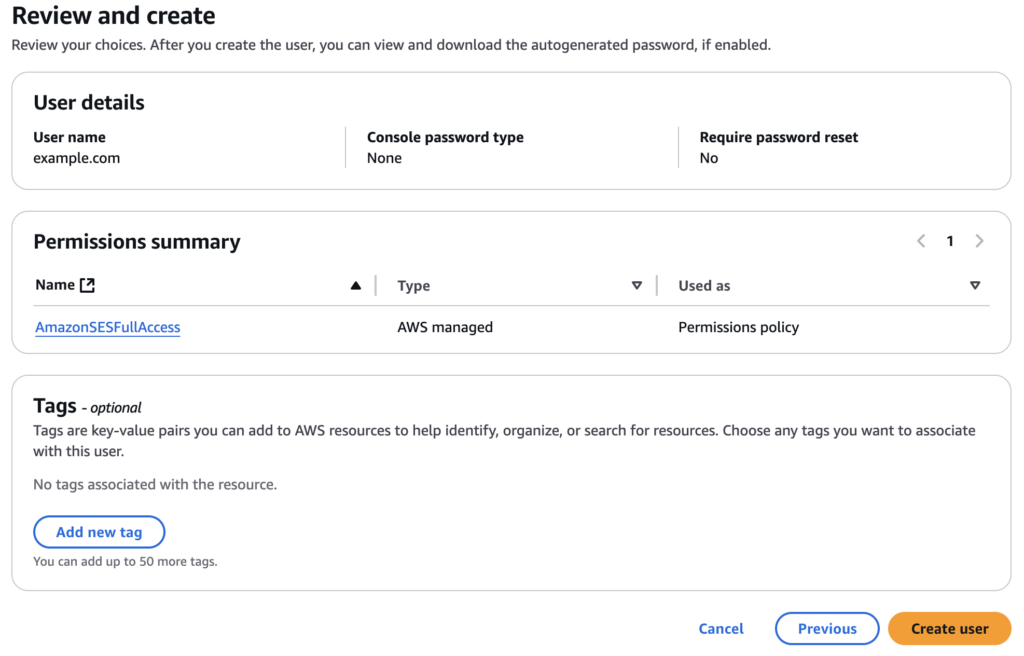
Next, you can review your settings and finally create the user.
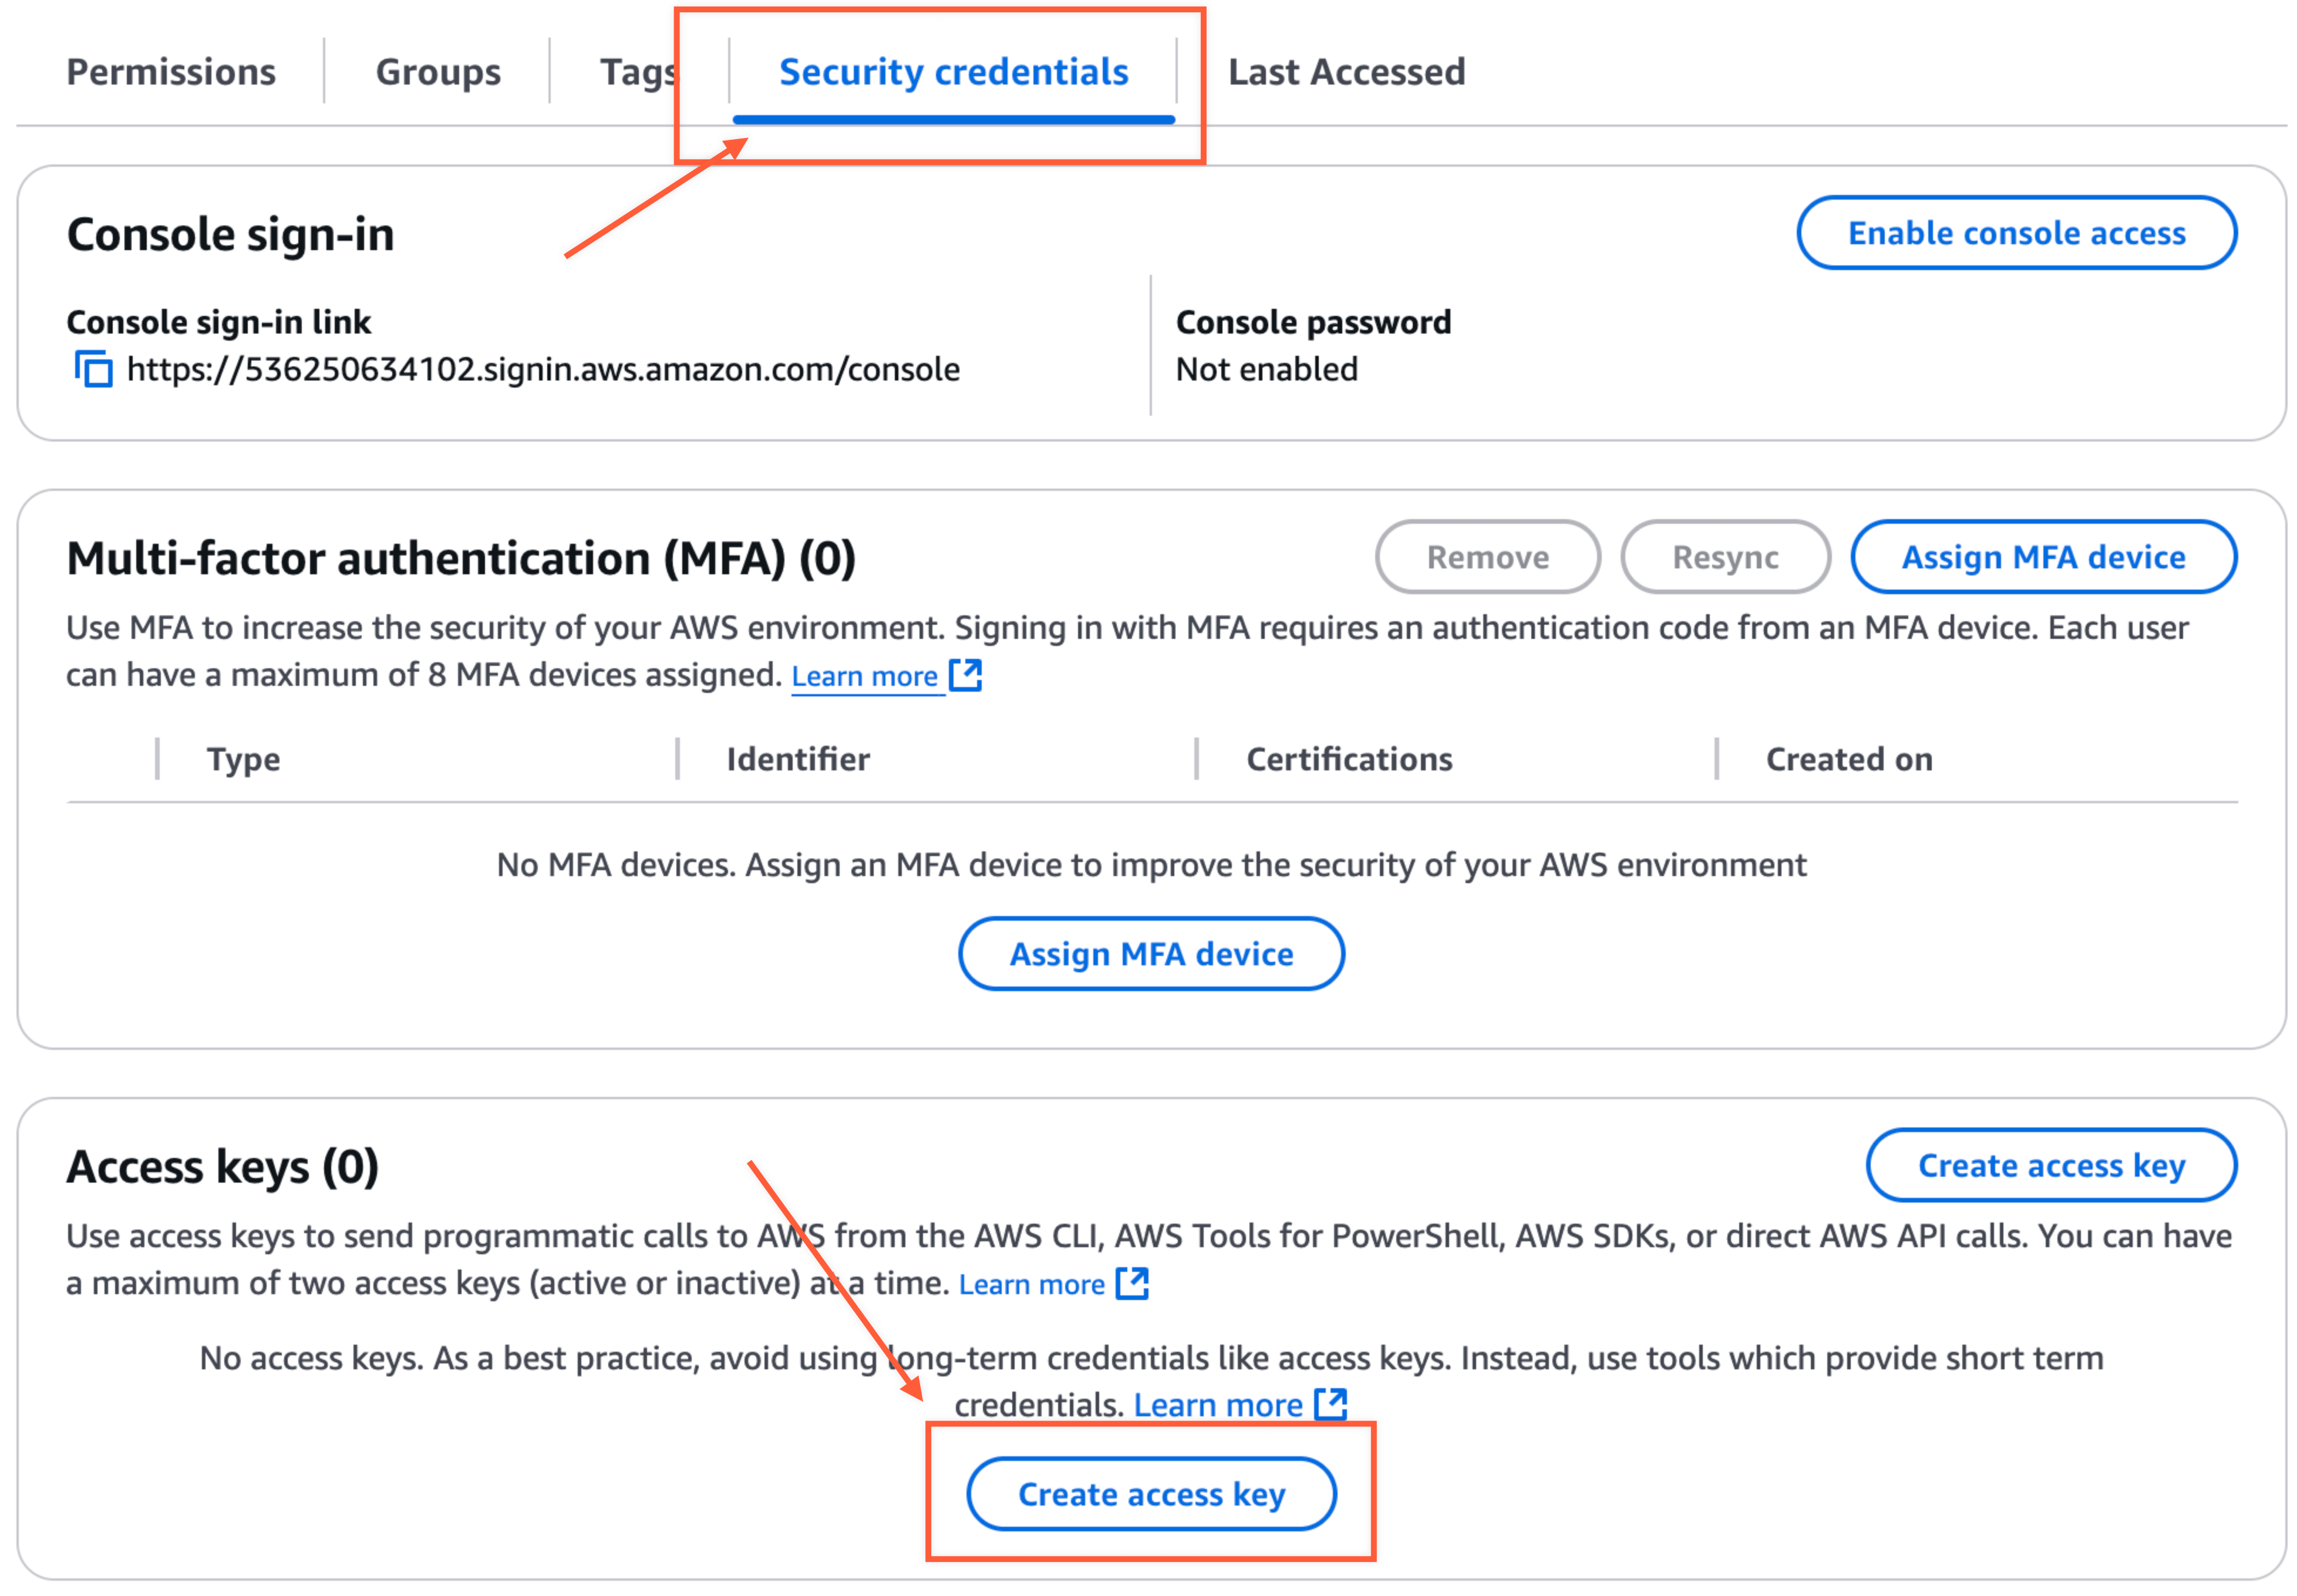
Security credentials
Once you have created the user you need security credentials for the Mailster settings page. It’s recommended to use the credentials for Mailster only and not for other services as well.
Amazon AWS will ask you how you use the credentials and give you some best practices on handling the credentials. Choose “Other” and click on Next to define an optional Description.
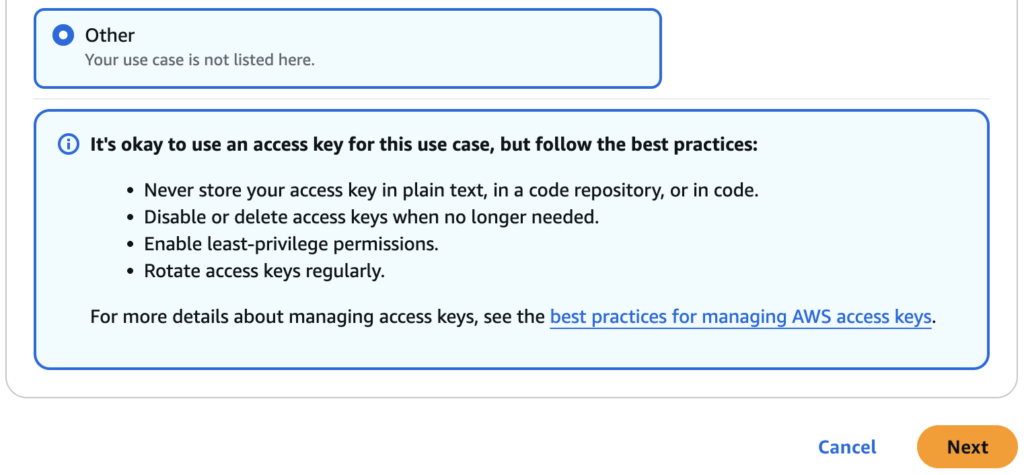
A Description is optional but you can use – again – your domain name for better identification.
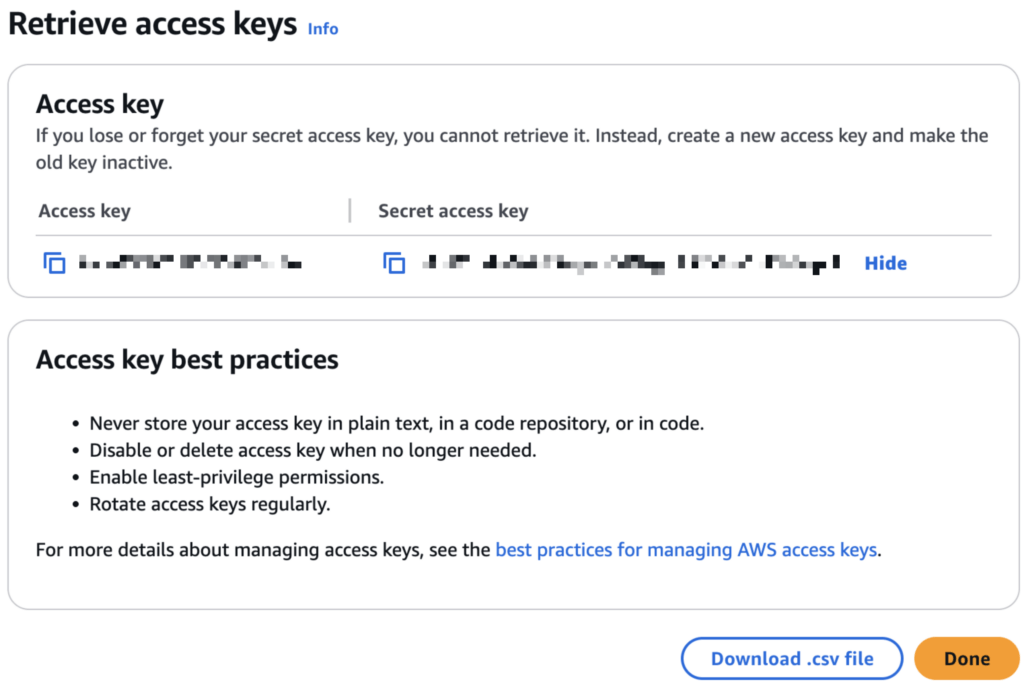
In the last step, you will get the Access key and the Secret access key you can use on the Mailster settings screen.
Use SMTP (deprecated)
In order to use an SMTP connection (which is usually slower and less secure), you have to create a different user and create dedicated SMTP credentials.
Set up Bounce Handling with Amazon SNS
The final step of your setup is the handling of bounces with Amazon Simple Notification Service. We’ll cover this in this dedicated article.