If you are sending your Campaigns with Amazon’s Simple Email Service you can use the regular Bounce option that comes with Mailster. If you like to have more control over bounces you should switch to AmazonSNS.
Before you start, make sure you have set up Mailster to use Amazon SES as described in this article.
In the Amazon SES section, click on Identities and find and click on the Identity you like to add SNS Notificationsto. Click on the “Notifications” tab:
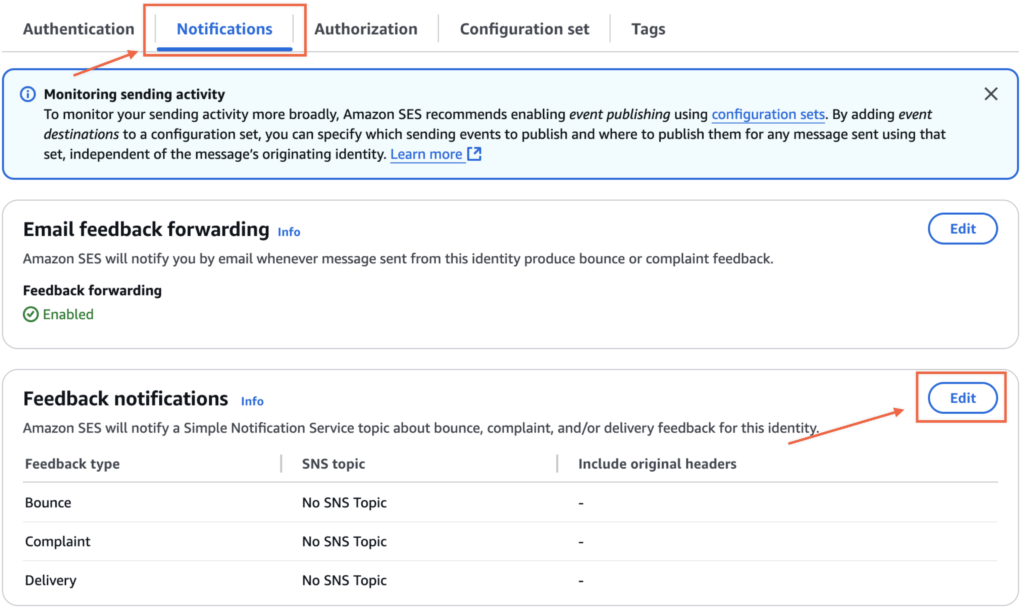
We need to change the Feedback notifications so AmazonSNS actually sends a notification (via a webhook) to your Mailster installation. Click on the “Edit” button.
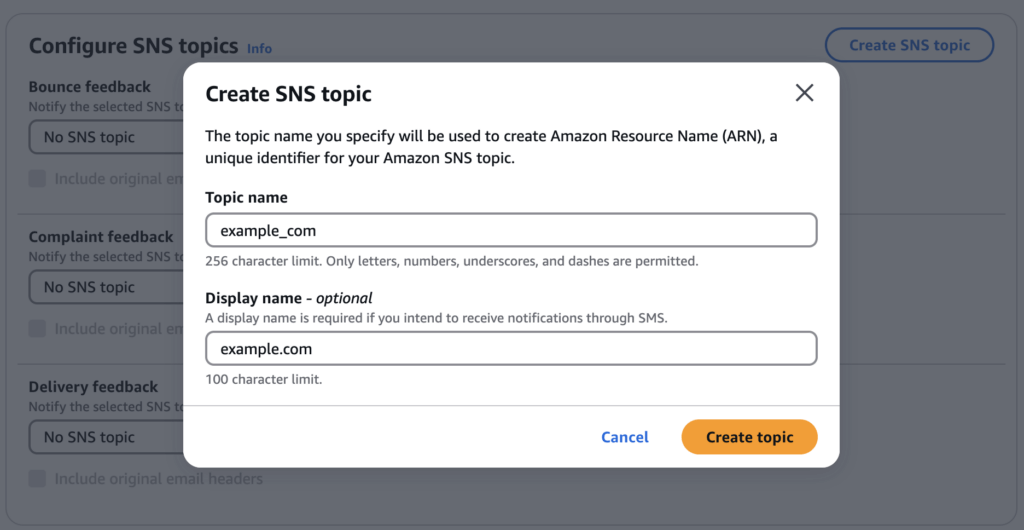
Now, a topic for each feedback type must be defined. Create a new one with your domain to better identify them later.
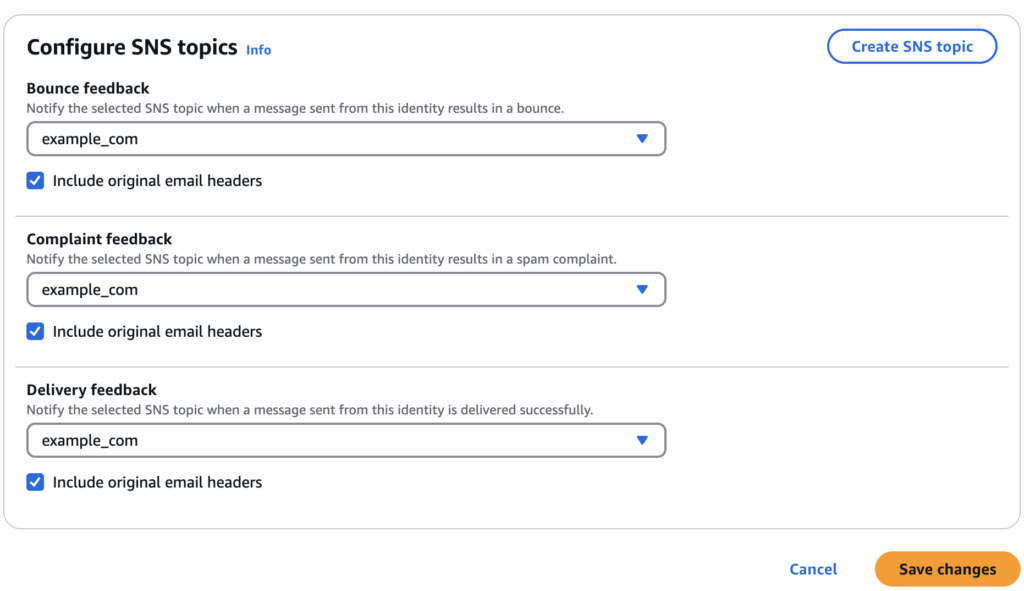
Once you have created your new topic, you have to assign it to two of the three sections:
- Bounce feedback
- Complaint feedback
Now we have to create and assign a new topic. Let’s head over to the Amazon SNS service to decide what should be done if a bounce or complaint happens.
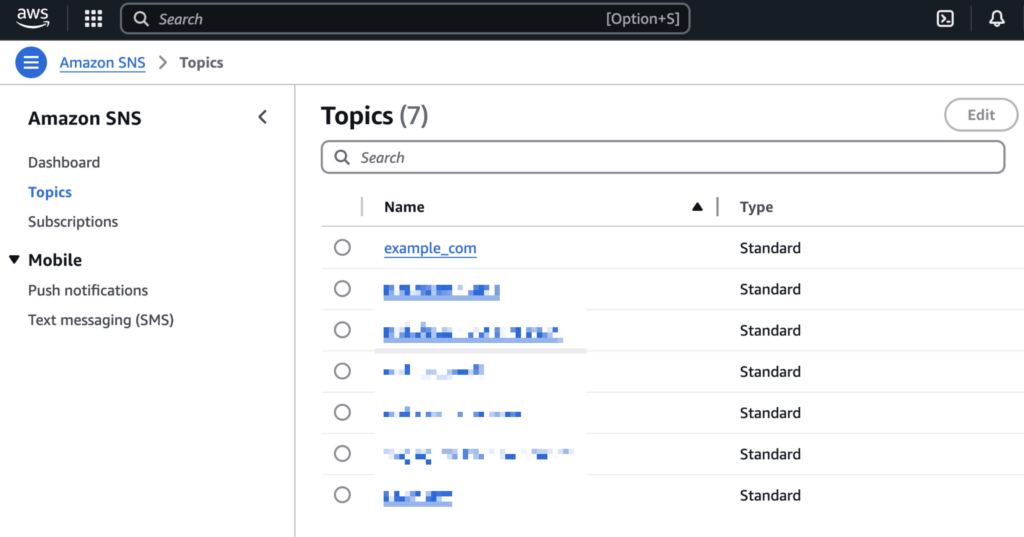
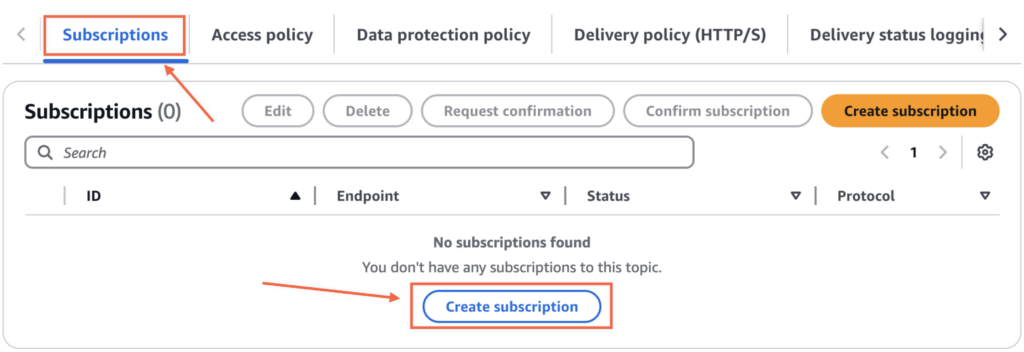
Click on the newly created topic and find the “Subscriptions” tab. Create a new subscription.
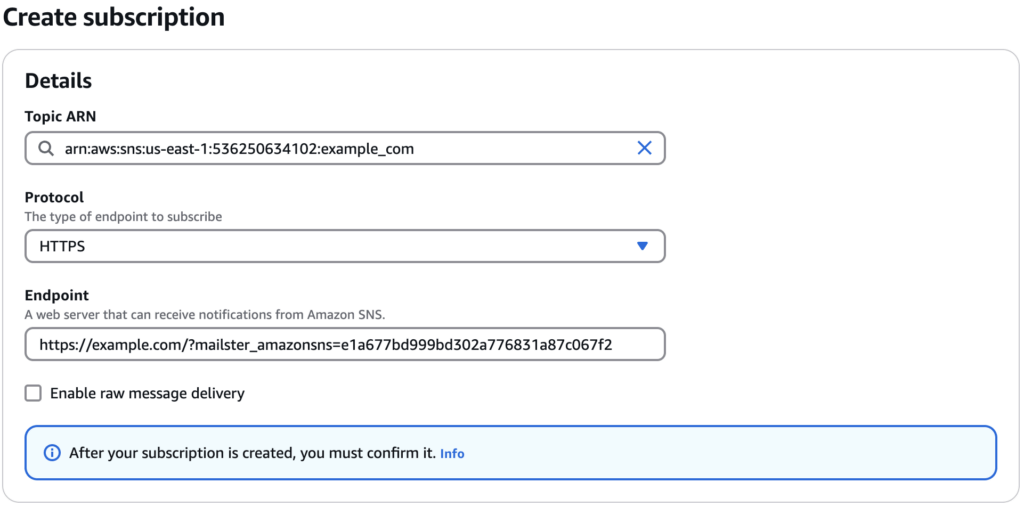
Assign the topic from the step before to the new subscription.
Once you confirm your new subscription, the Endpoint on the settings page will turn green.

Choose either “HTTPS” or “HTTP” depending on how your website is set up. As Endpoint use the URL from the settings page.
AmazonSNS now sends a confirmation to this endpoint, and the add-on automatically verifies it.

Your setup is now complete, and Mailster will start collecting bounces and complaints starting from the next campaign you send.