With SparkPost you get a solid delivery provider. There’s some setup required before you can use this service though.
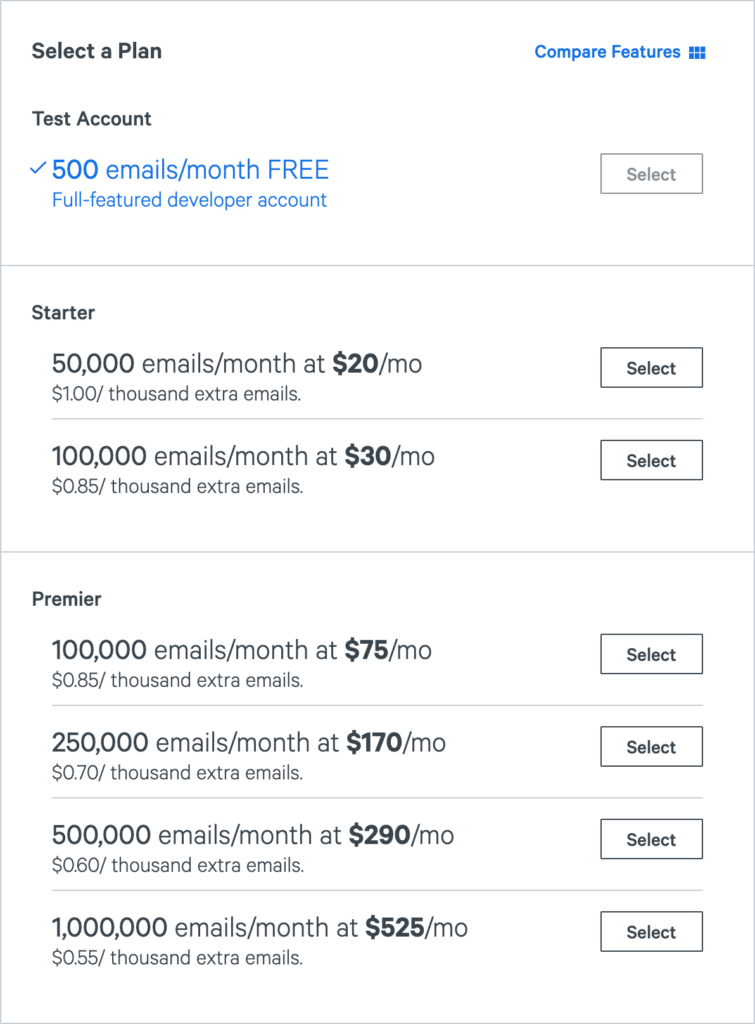
SparkPost no longer offers a free tier but you can test their service with a “Test Account”.
1. Sign up
First Sign up here and follow the instructions on the screen. Choose the free plan or go with a paid option if you need more.
2. Add a Domain
SparkPost needs the domain you are sending from. You must have access to the DNS entries so SparkPost can verify that you are allowed to send from this domain.
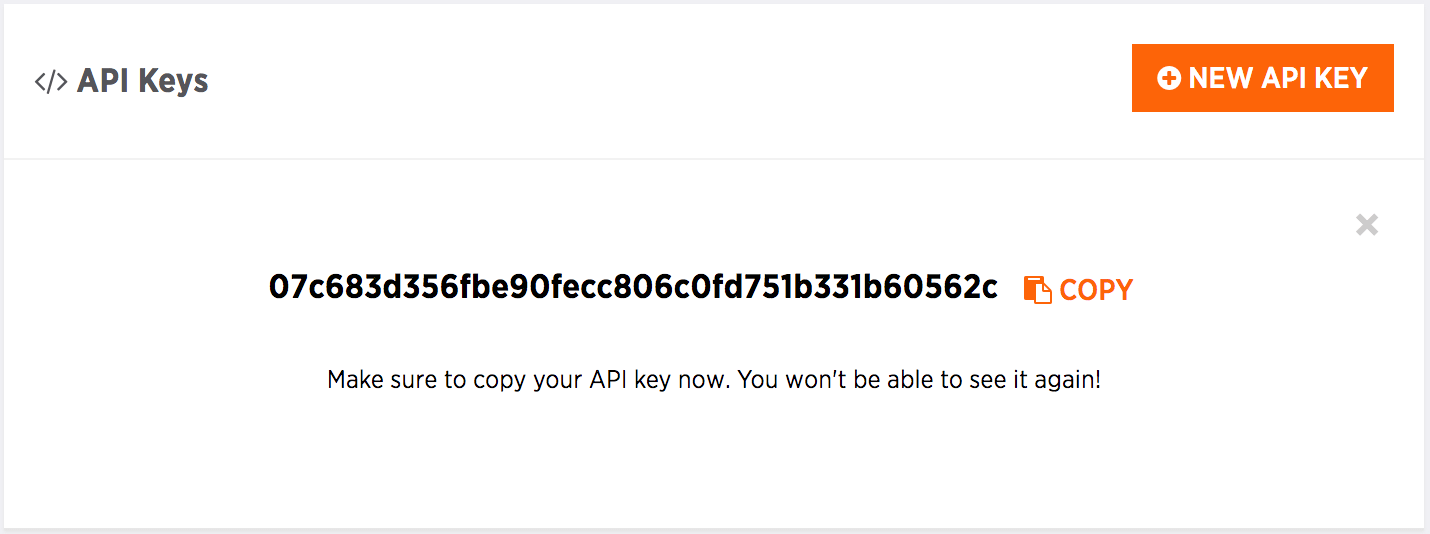
3. Create a new API key
Head over to the API Keys section and create a new API Key:
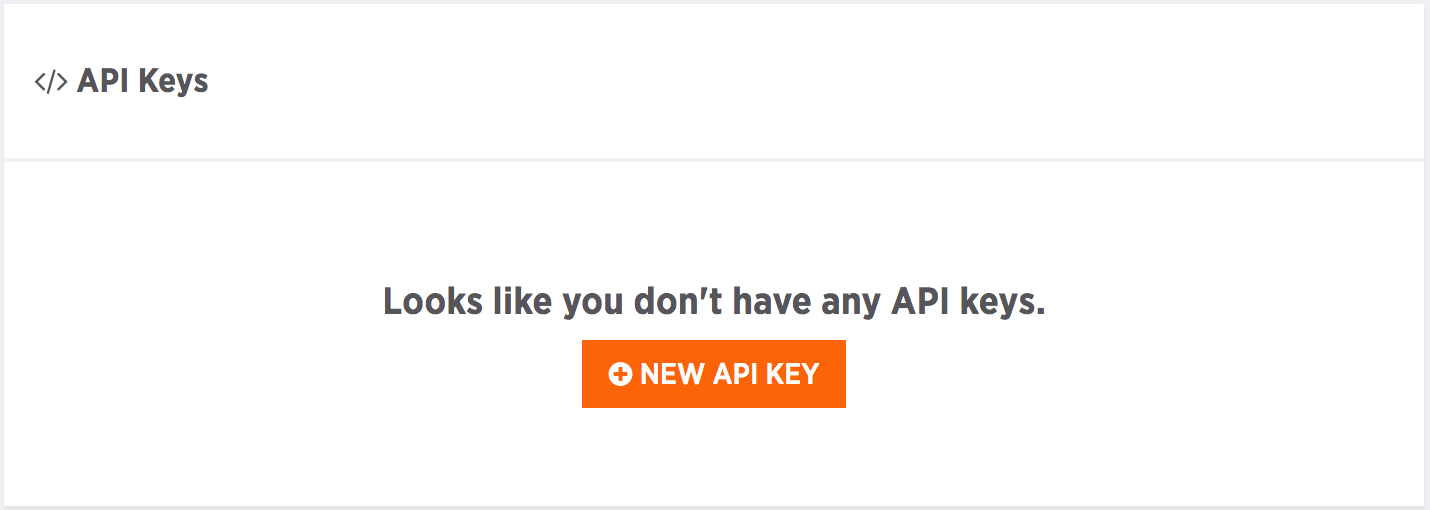
Choose a name like “Mailster API Key” to identify it later.
Mailster can only work with a Master API Key as it requires Account read capabilities.
API Permissions
Mailster will need at least the following API Permissions:
Account: Read, Message Events: Read-only, Send via SMTP (for SMTP delivery), Sending Domains: Read, Subaccounts: Read, Transmission: Read/Write (for WEB API delivery).
Allowed IPs
You can keep this field blank if you are not sure which IP you are sending from.
4. Create a Sending Domain
You have to create a sending domain from the domains you own and where you can change DNS records.
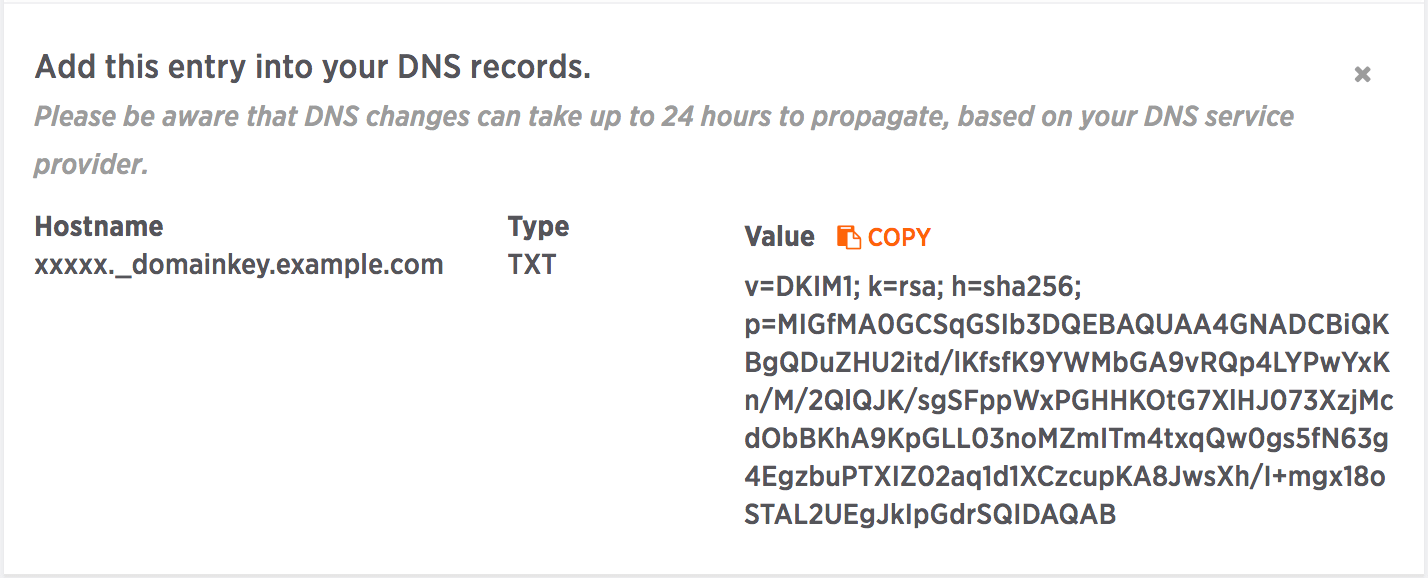
A new TXT record to your domain. Ask your provider how to do it.
A change to the DNS entries can take up to 24 hours to propagate!
You can also use email verifications which is normally quicker.
Wait until your domain is ready to send
You have to make sure your domain is “ready to send”.
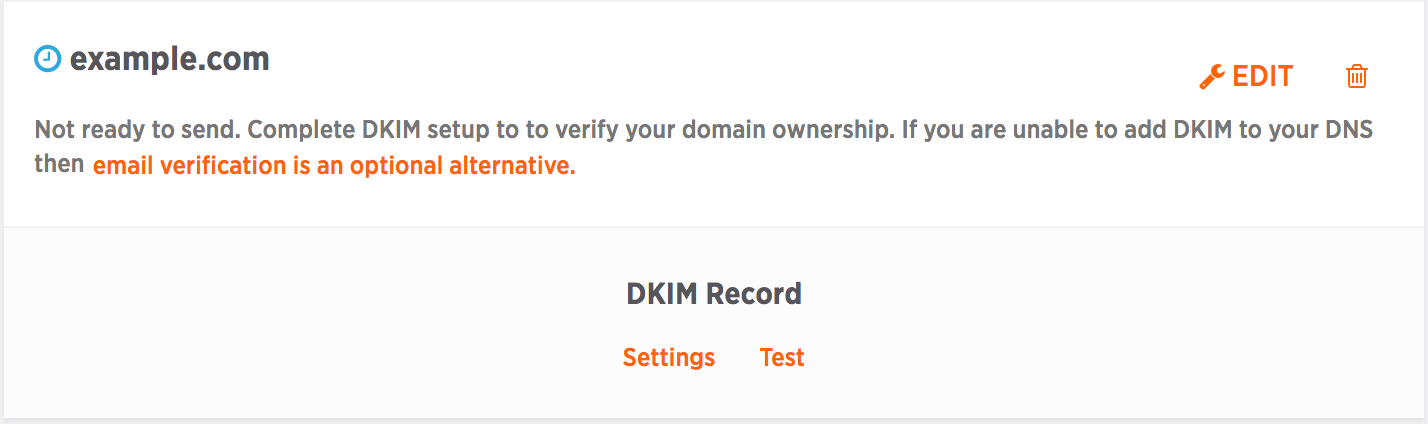
After your DNS setup has been SparkPost will review your domain.
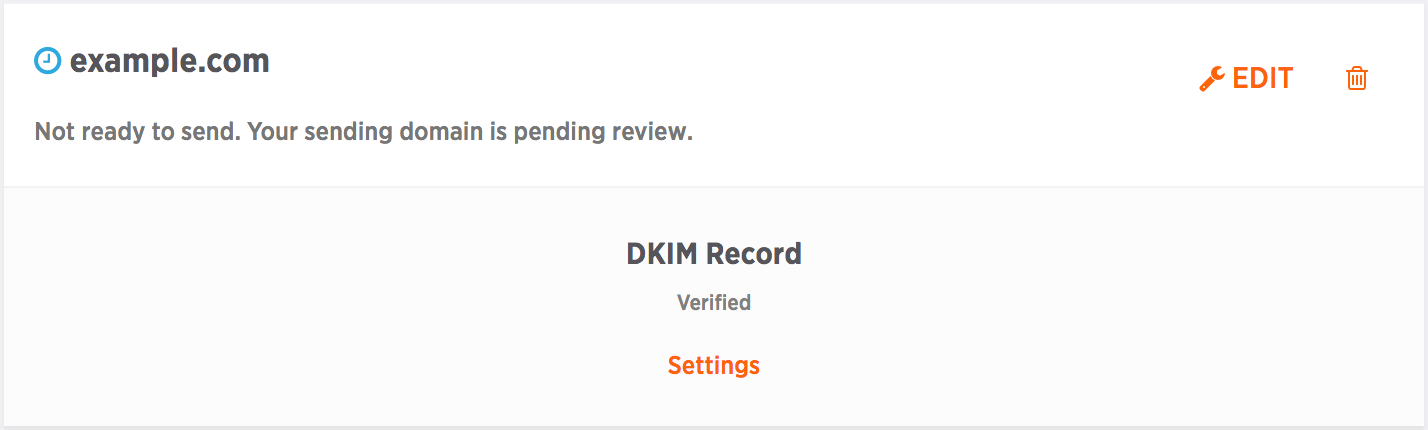
A verified domain will look like this:

5. Download the free SparkPost add-on
Head over to the WordPress repo and download the SparkPost Integration. Alternatively, you can do this via your WordPress plugin site too. After enabling you find a new delivery option on the Delivery tab in the Mailster settings.
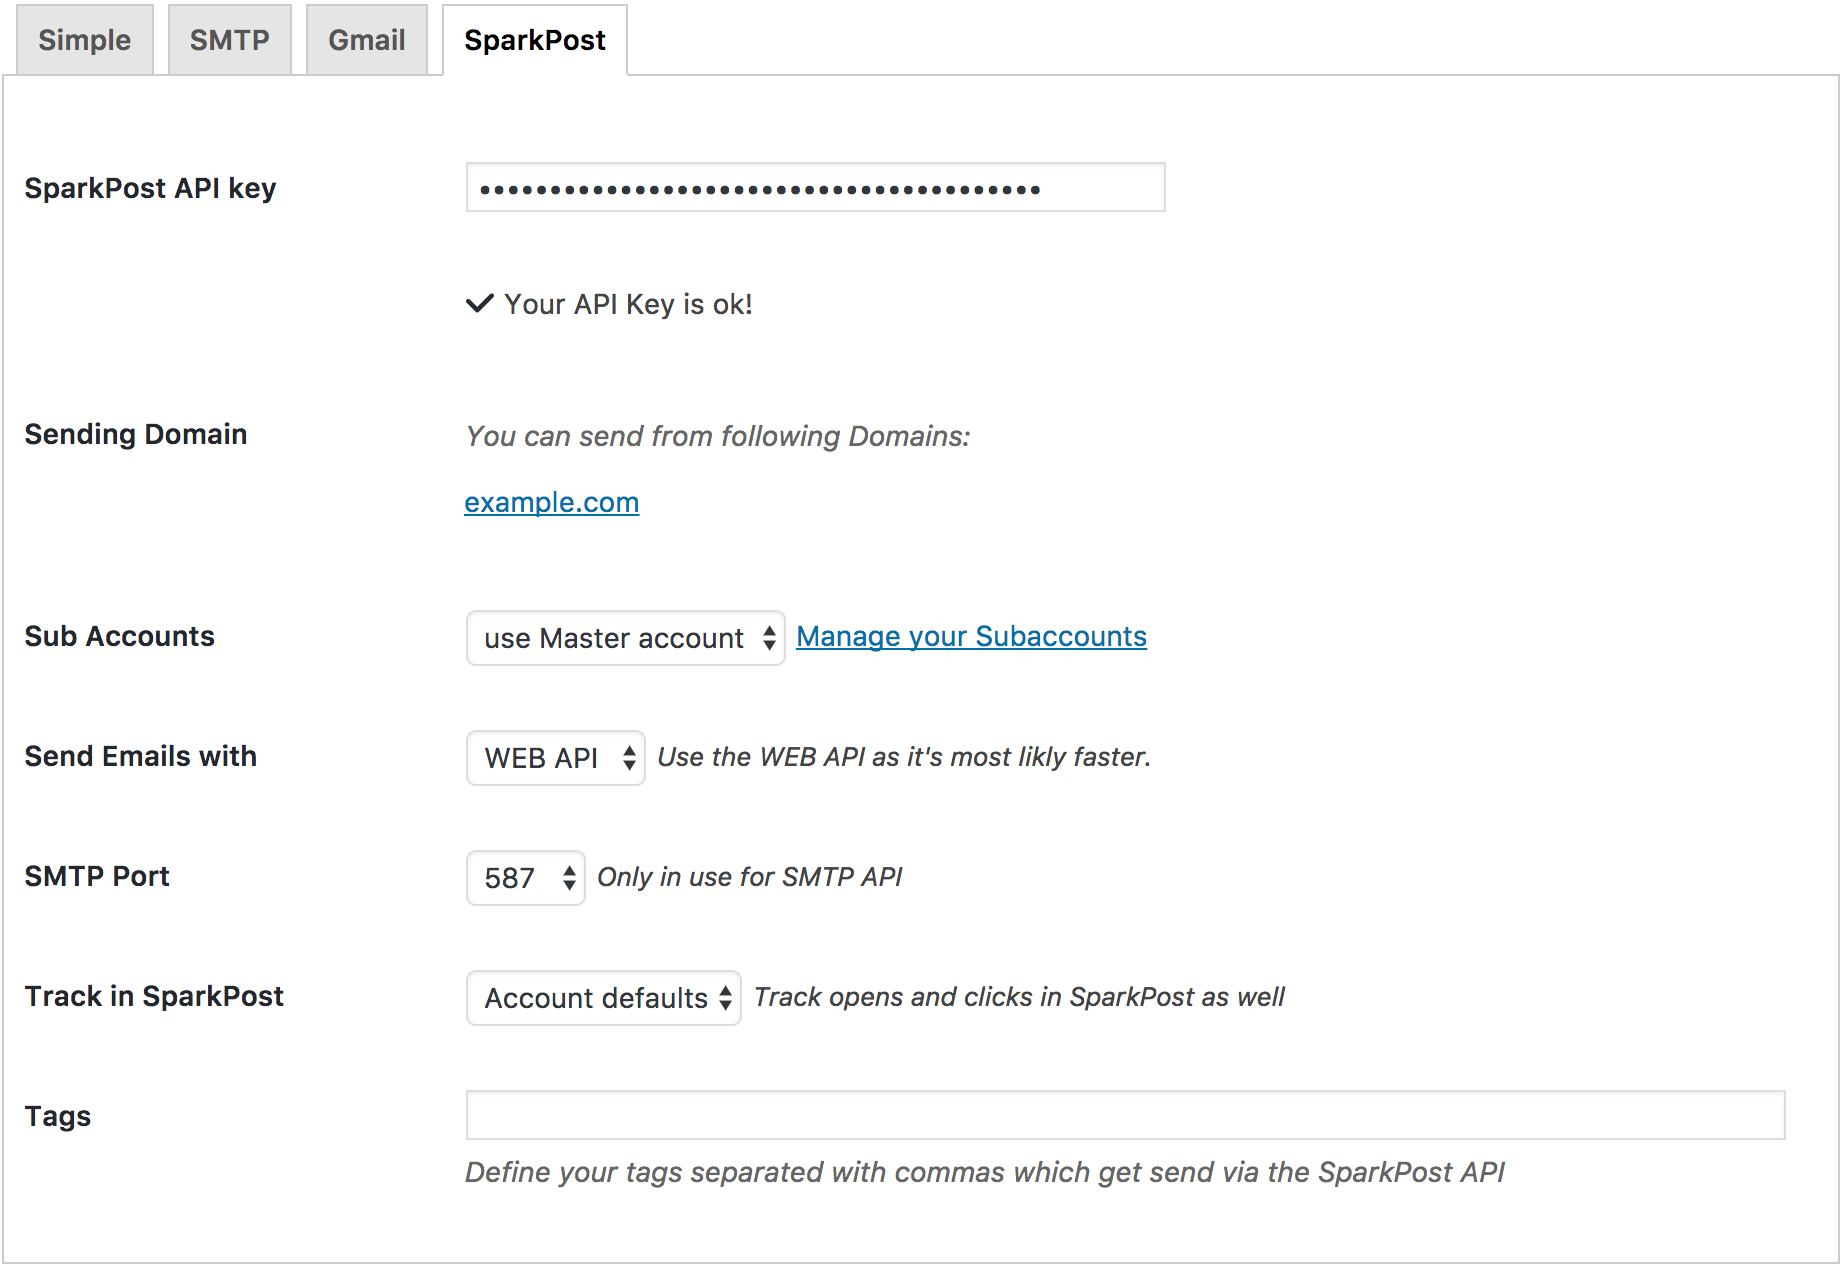
Enter the API Key from step 3 and save your settings. More options should be available.
Sending Domain
Make sure the domain of the email addresses you use as “from” and “reply to” in your campaign are listed here. If not add them via your SparkPost dashboard.
Sub Accounts
If you have multiple licenses of Mailster or use SparkPost with other services you should create a sub-account for every website to keep things together. If you use SparPost only for a single Mailster installation you can use the Master account.
Send Email with
SparkPost has a WEB API and a SMTP API. If possible you should use the WEB API as it’s faster and returns better error messages. If it’s not possible you can go with the SMTP API too. Both offer the same functionality.
Track in SparkPost
Define if emails from Mailster should be tracked in SparkPost. This will wrap all links in SparkPost tracking links so you can use the internal stats from SparkPost.
Tags
You can add a comma-separated list of tags you like to attach to each mail which can be found on your SparkPost Dashboard.
Start sending via SparkPost

Now you can go back to Mailster and send a test mail on the settings page. Make sure an email address with the verified domain is used in the from field, the reply-to field as well on the bounce address field.