Mailjet is a highly efficient email marketing tool that seamlessly integrates with Mailster. Notably, it offers exceptional support for bounce handling straight from the get-go.
Sign up for an account
Create an account on Mailjet by signing up for an account on Mailjet.
Create an API key
Go to your account and locate the “API” option in the top menu.


Add a sender domain
To send from your own domain Mailjet needs to verify you as the owner of your domain. You can alternatively verify a single email address if you don’t have access to your domain’s DNS settings.
Go to Account => Sender & Domains and click on Add a Sender Domain or Address
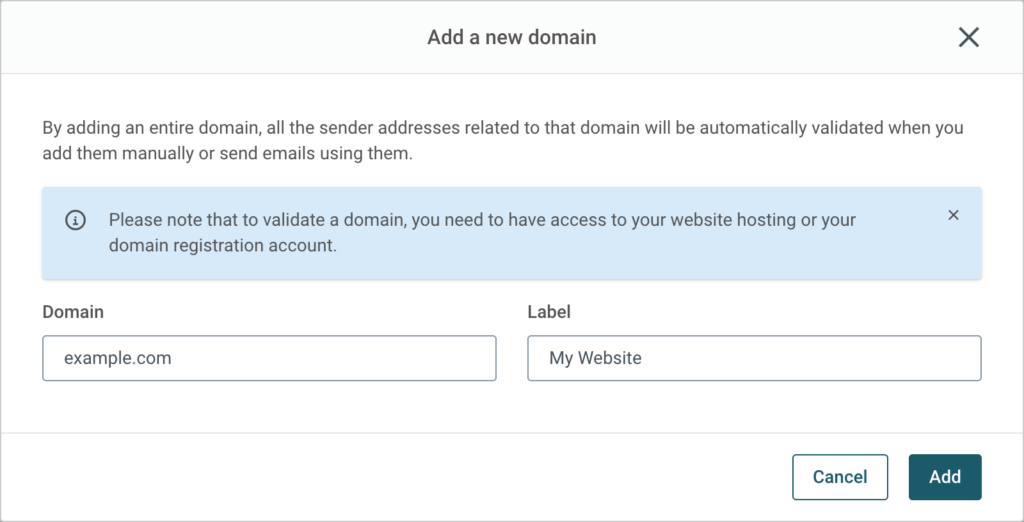
To proceed, you need to add DNS entries to your domain. Mailjet provides two alternatives for verifying your domain. Kindly refer to their guide for detailed instructions.
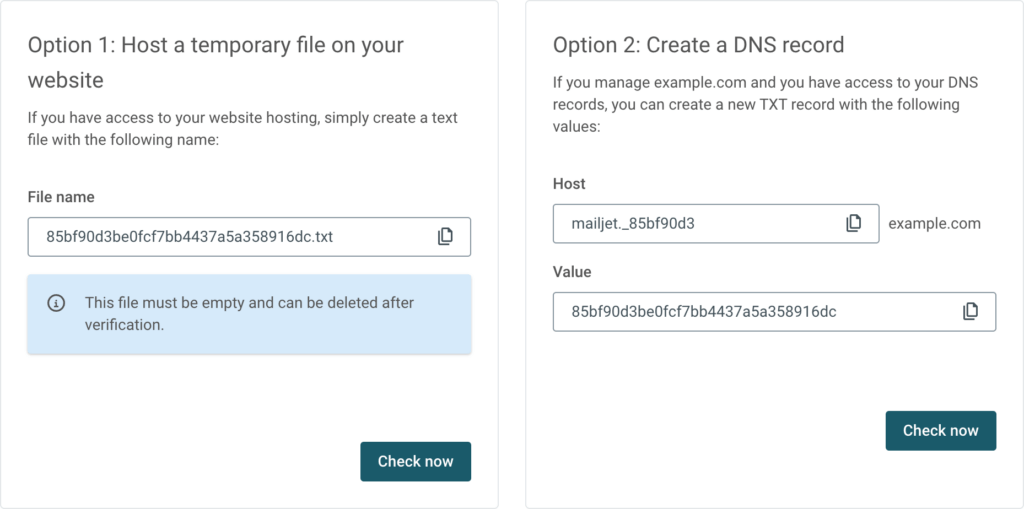
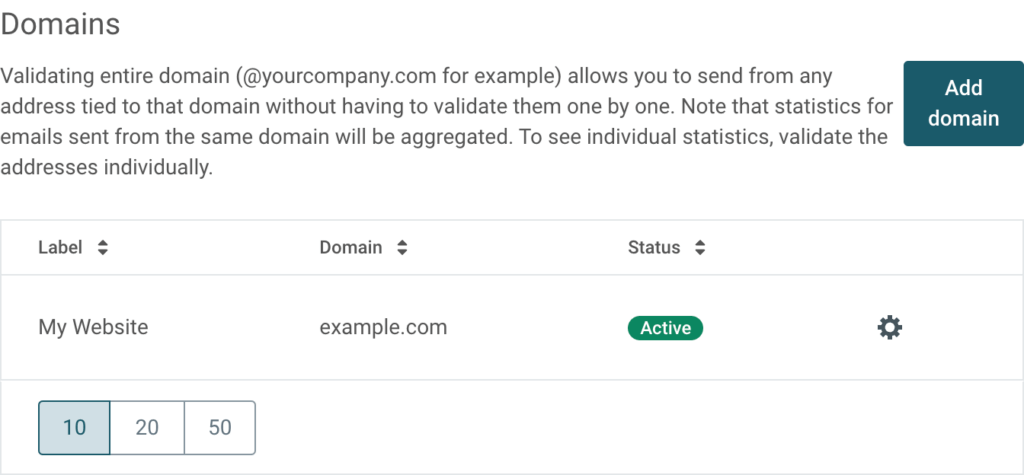
After the verification of the checks is completed, you gain the ability to utilize the verified domain.
SPF/DKIM Authentcation
Moreover, it is essential to configure SPF and DKIM protocols to ensure that your emails do not get classified as spam and end up in recipients’ spam folders.
The configuration is comparable and necessitates the re-entry of your DNS information.
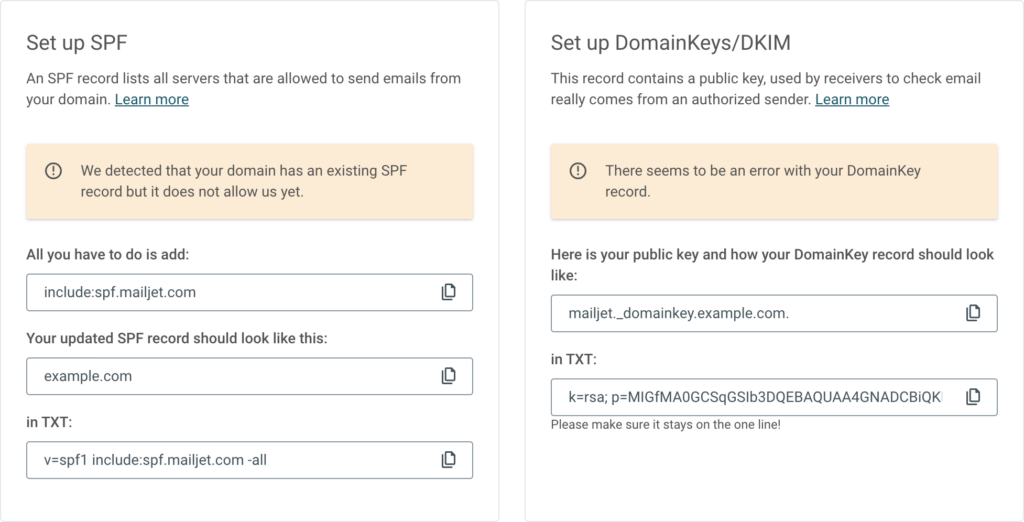
After completing this task, you will see a green OK displayed on the overview.

Setting up webhooks to handle bounces in MailJet
To enable Mailster to manage bounces, spam complaints, and unsubscribed actions, the necessary step is to configure webhooks within Mailjet.
Locate the specific endpoint on the Mailster settings page, which resembles something along these lines.
https://example.com/?mailster_mailjet=98752300cbb36f4a1b1c55d25295b945Navigate to the Event notifications (webhooks) section and proceed to add a new Trigger for the following events:
- Bounce
- Spam
- Blocked
- Unsub
Make sure you use the same URL endpoint from above for every event type.
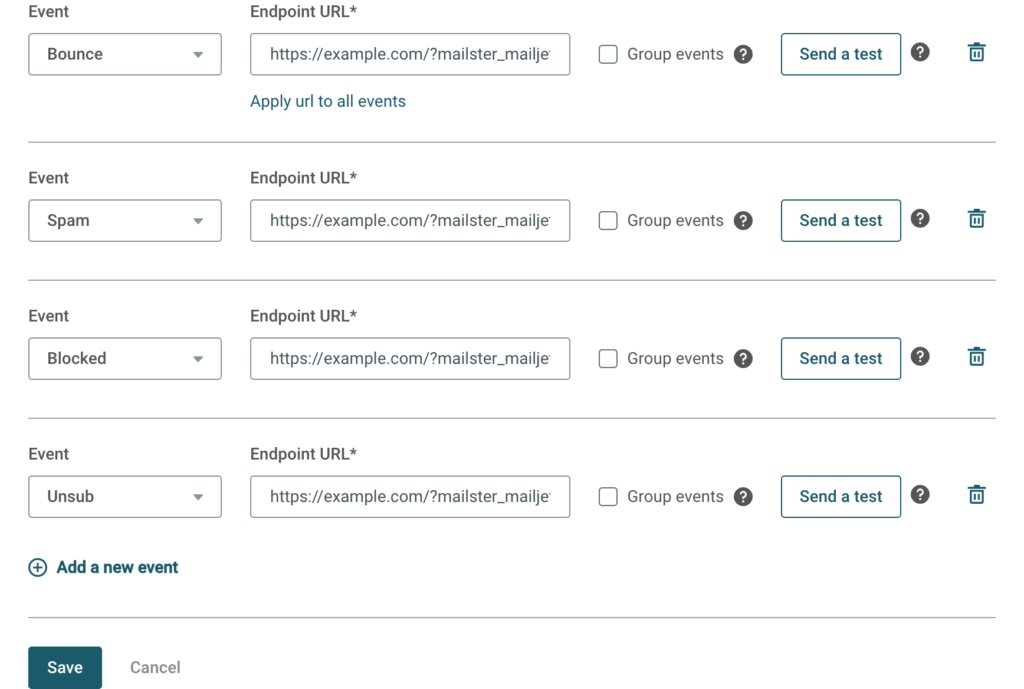
After conducting a test on any of the connections, the endpoint field in the settings will change to green.

Send a test mail

Once your setup is done it’s recommended to send a test mail.