If you regularly include dynamic posts in your campaigns you are familiar with the auto feature of Mailster. To change the content of this feature you can add a simple function in your themes function.php file.
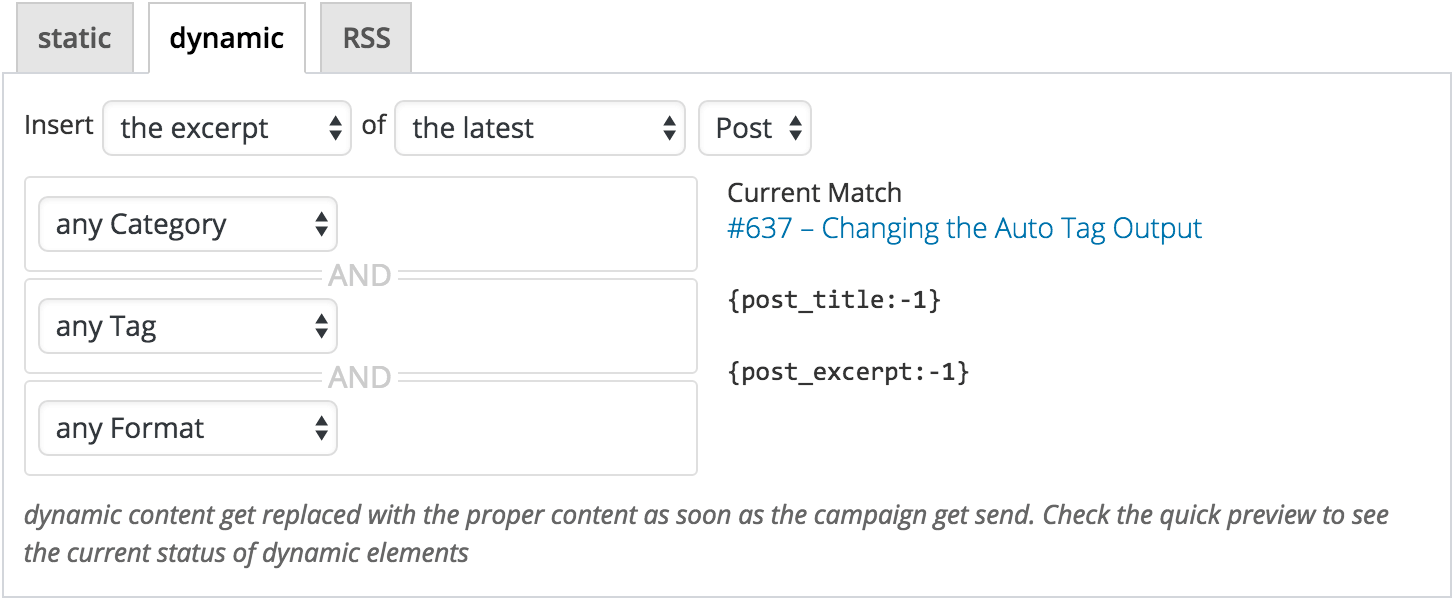
By default the content used in this feature looks like this:
{post_title:-1}

{post_excerpt:-1}
This will insert the title of your last post ({post_title:-1}) as the headline and the excerpt ({post_excerpt:-1}) as content. In the edit bar it will look something like this:
If you like to link the headline to the actual blog post you can wrap the anchor tag around the tag. Add a new snippet to your themes functions.php:
function my_mailster_auto_tag( $pattern, $post_type, $options, $post ){

	return $pattern;
}
add_filter( 'mailster_auto_tag', 'my_mailster_auto_tag', 10, 4 );
This will basically add a filter to the ‘mailster_auto_tag’ and allow you to alter the $pattern of your output. At this state, it returns the original $pattern so there’s actually no change.
Changing the pattern
The $pattern is an associative array and contains the following keys:
- title – the string used for the title
- alt – used for the alt tag if an image is in the module
- content – used if the content is selected
- excerpt – used if the excerpt is selected
- link – the link to the post
- image – the image tag which links to the feature image of the post
To wrap the title with a link you have to add one line to your function:
$pattern['title'] = '<a href="{'.$post_type.'_link:'.$options.'}">{'.$post_type.'_title:'.$options.'}</a>This replaces the old title and adds a new pattern with links. Note the $post_type variable which gets replaced with the selected post type. The $options represents the content after the “:” which is -1 for the latest post in this case.
Adding the name of the author
You can append the author’s name after the excerpt if you add this line:
$pattern['excerpt'] .= "<br>".'by {'.$post_type.'_author_name:'.$options.'}';The whole code snippet you have to add looks like this:
function my_mailster_auto_tag( $pattern, $post_type, $options, $post ){

    $pattern['title'] = '<a href="'.$options.'}">{'.$post_type.'_title:'.$options.'}</a>';
    $pattern['excerpt'] .= "<br>".'by {'.$post_type.'_author_name:'.$options.'}';

    return $pattern;
}

add_filter( 'mailster_auto_tag', 'my_mailster_auto_tag', 10, 4 );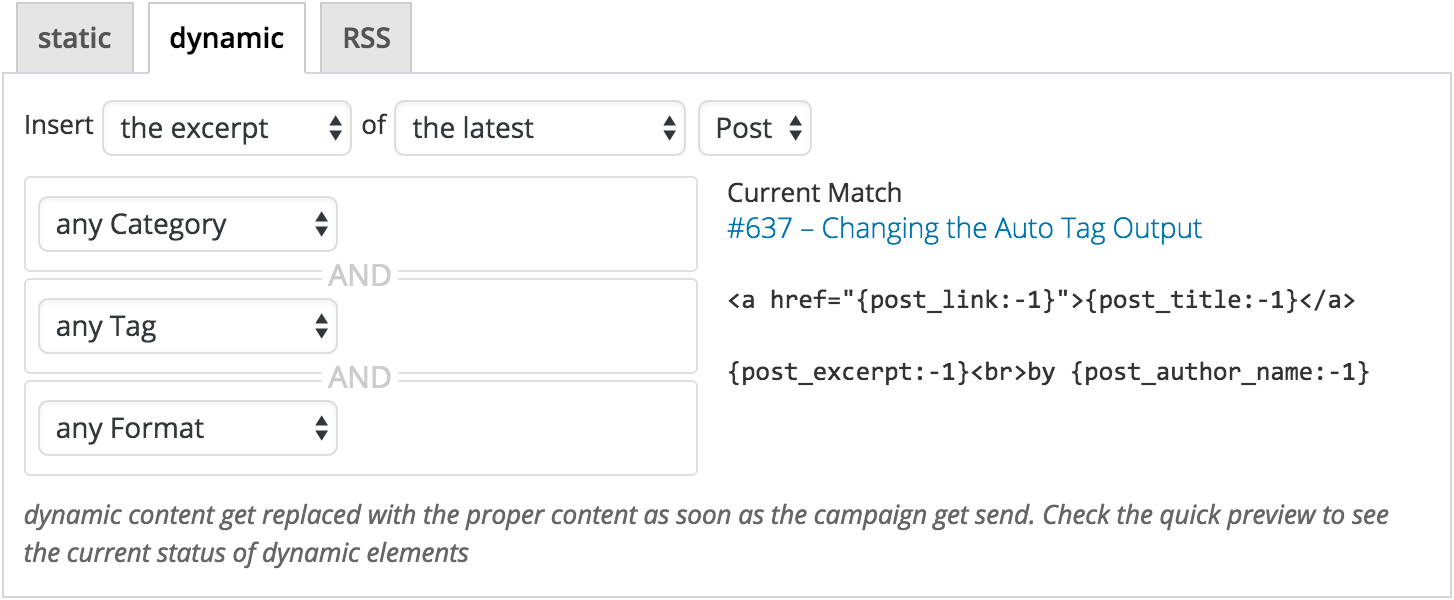
The edit bar now reflects your changes and you will know if everything went well.
Targeting multiple elements
By default, Mailster uses the first occurrence of a <single> element of the chosen module to inject the $pattern['title']. If you have multiple <single> elements, <multi> or <img> elements you can return an array like this:
add_filter( 'mailster_auto_tag', function ( $pattern, $post_type, $options, $post ){

    $pattern['title'] = array(
         'First Title',
         'Second Title',
    );

    return $pattern;
}, 10, 4 );
This will insert “First Title” into the first <single> element and “Second Title” in the second <single> element.
Did you know you can exclude certain posts from Mailster? Read more.